Steam now has a built-in game recorder that you can use to record, cut, and save gameplay clips. This makes it easier than ever to record your screen and it’s totally free, unlike a dedicated capture card (though those are still useful for more professional setups.)
Additionally, it doesn’t require the installation of any additional programs, as it runs entirely within Steam, and can be accessed via the Steam Overlay. Sound good? Ok, here’s how to use the Steam game recorder.
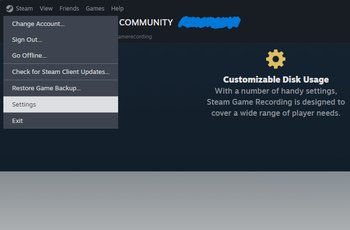
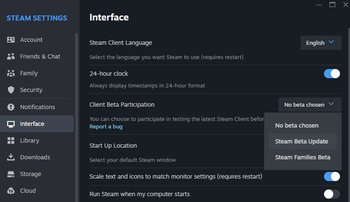
First of all, this feature is currently in Beta, but it's an open Beta, meaning that anyone can use it – you just need to opt in first. Here’s how to do that:
Ok, now that the recorder is available to use, here’s how to set it up to record properly. Luckily, there are plenty of settings available so we can really dial it in. Let’s go.
First, you need to choose the mode of recording. “Record in background” will continuously record your gameplay at all times, but only the last X minutes of gameplay will be kept for you to save as a video clip. You can decide how long you want the game recorder to record for in the settings below. This is the best option if you just want to chronicle the occasional incredible gameplay moment but have no use for hours and hours of video footage.

“Record on demand”, by comparison, is the more traditional way of recording gameplay. It won’t do anything at all until you press the start button, then it will record until you press the stop button. This is more ideal for those recording long gameplay sessions in bulk.
Whichever option you choose, you can now choose what quality you want to record in, measured in Mbps. The options are:
Basically, the higher the quality, the larger the file size of the video clip will be. At the time of writing, the .MP4 video clip will always be at a resolution of 1920x1080, regardless of which quality option you select. That doesn't mean the quality settings do nothing, it just means that they don't affect the resolution. Below this, you’ll find an option to choose where you want the recordings to be saved. We recommend making a specific folder that’s easily accessible.
Recording a sweet gameplay moment is pointless if you don’t capture the audio along with it. This becomes doubly true if you’re playing alongside friends. Let’s take a look at the audio settings.
The Steam game recorder will always record the audio of the game you’re playing, so you don’t need to worry about that. However, you can choose what other audio sources it captures.
What’s the point of recording yourself missing six revolver shots in a row if you can’t hear your teammates laughing at you in the clip? That’s where the “Game and Selected Programs” option becomes very useful.
Once you click it, you’ll be given a list of programs that the game recorder can capture audio from. Simply check the box next to “Discord”, and the Steam Game Recording will capture all of the antics from Discord.

If Discord doesn’t appear in this menu initially, just launch Discord and the option will appear. You won’t need to reselect this each time, by the way, once you set this up, it will always capture Discord audio when you record.
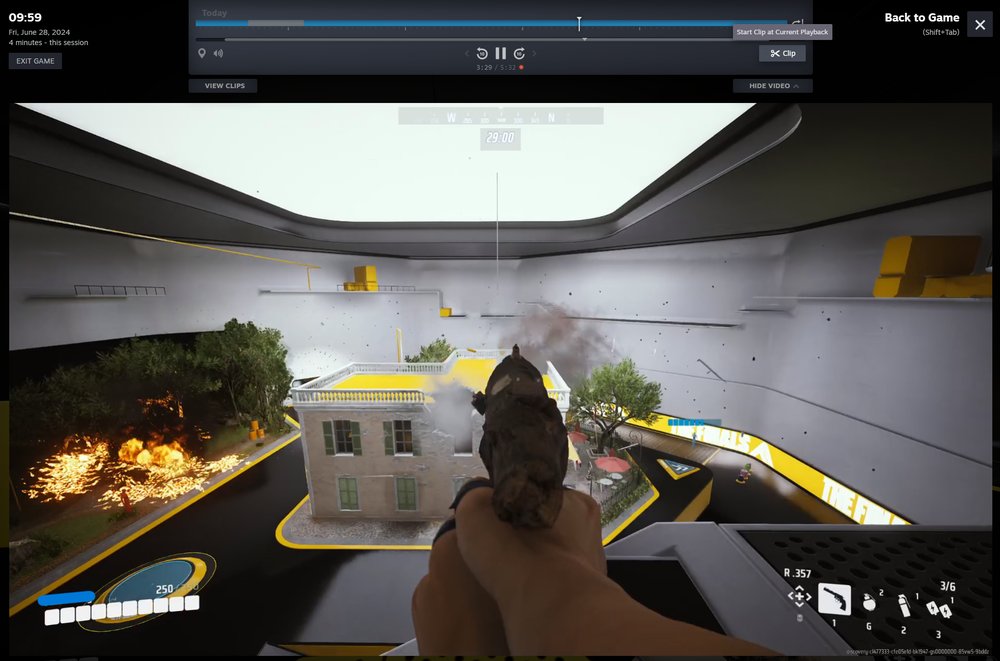
Ok, now we’re all set up, let’s take a look at how to actually save your gameplay clips.
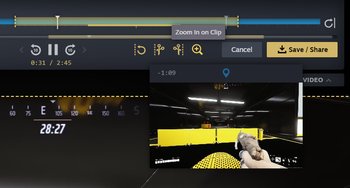
So, you’ve been playing The Finals, and you hit an unreal headshot on a dastardly Light player using dash. It feels good and you want to re-live the satisfaction. Here’s how to save that clip.

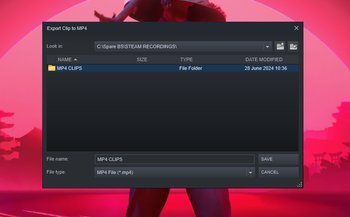
And that’s it. You’re done. The clip is now saved in the folder of your choice. Over time, this folder will fill up with your best and worst gameplay moments. Enjoy.
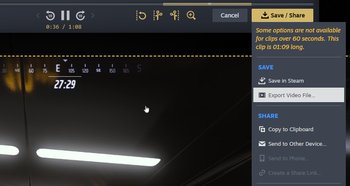
No. If you click the "Save in Steam" option, the clips will be saved in a gallery there and you can export them as .MP4 files whenever you like. Don't worry, you don't need to stop playing for 20 seconds to cut and save and export each and every clip if you don't want to. You can even save the entire clip into Steam, then cut it later.
Screen capturing software typically has some amount of impact on your PC's performance, but we didn't see any noticeable latency or drop in frame rate. Obviously this will depend entirely on the specs of your specific PC, though.