

For a change, today we're bringing you a page not written by us at CORSAIR, but instead a build log from one our modding friends. He took it upon himself to make a creative and unique case mod for the CORSAIR 2000D.
We asked him to keep a diary of sorts while he worked and to type it up into a build log. This way you can get a rare insight into the whole process of bringing a bespoke case mod to life.
OK, that's enough preamble, everything after this is written by Alessandro himself. Enjoy
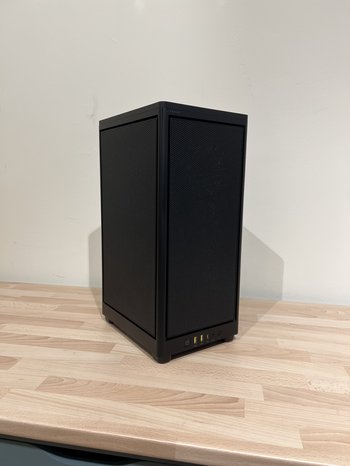
Hello and welcome to the modding forge! I am Alessandro aka Explore Modding, and today I will bring you through a great journey: the making of project Quattro, a casemod based on the Corsair 2000D mini-ITX case!
In a world where manufacturers make it so easy for you to have a flashy, amazing looking build out of the box, I’m the one who doesn’t stick to the rules and goes to enthusiasts’ jail for things like installing a passive air cooler on the CPU and a full blown custom watercooling loop on the GPU, just for the sake of having something that looks unique.
This build you’re about to see is no different. The 2000D is already perfect for what it’s supposed to do, so why change it?
Yeah, this is the bit where I say “why not?”.
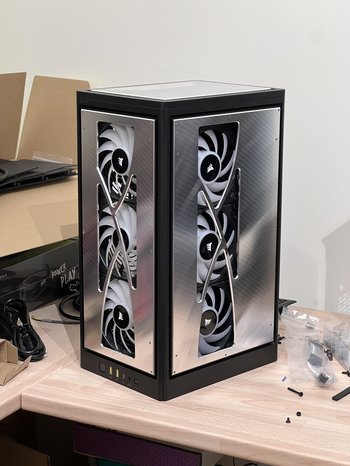
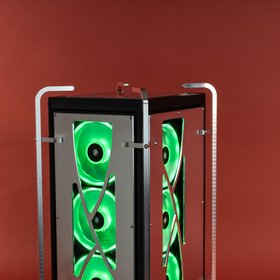
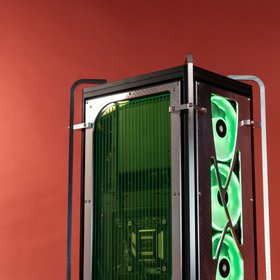
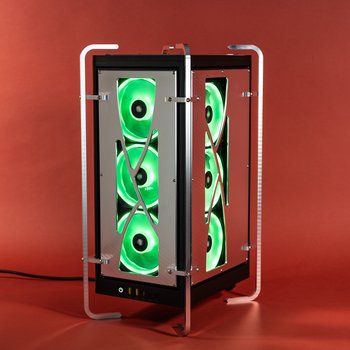
Project Quattro is born from the idea of a more tridimensional take on a very boxy case, with some Explore Modding signature elements like the funky feet/pedestals and the shiny machined aluminum.
Since the internals are barely visible from any angle of this case, I decided to just go crazy on the outside, which means modifying every possible side of the thing.
Every project starts with some brainstorming and 3D modeling, which will then have to be fine tuned as well since I use a CNC machine to cut my parts.

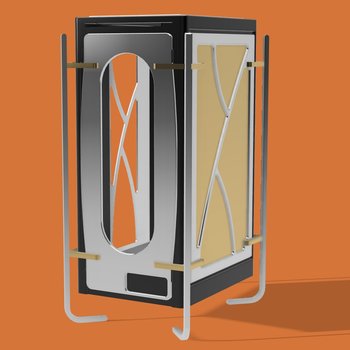
These images show an early stage of the final design, but let’s start from here.
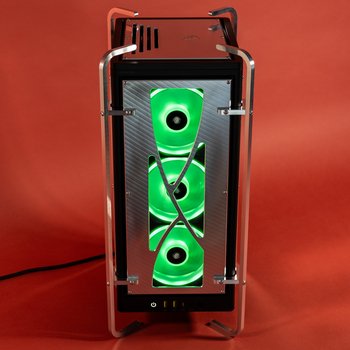
As you can see, the overall structure of the case is there, with the aluminum and brass parts being the custom bits that I’m going to make (spoiler: no brass was used in the final project, sorry brass fans). The 2000D features a clever full mesh design to assist airflow on all sides, and these meshes mount onto plastic side panels. Of course, all of those panels can be detached from the case and same goes for the meshes, which I decided to replace entirely with aluminum paneling, for a much more classy look.
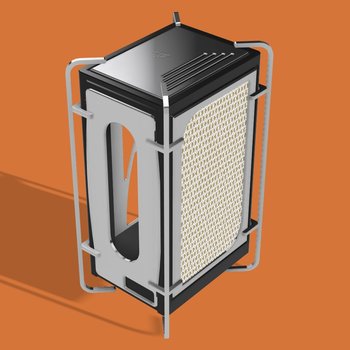
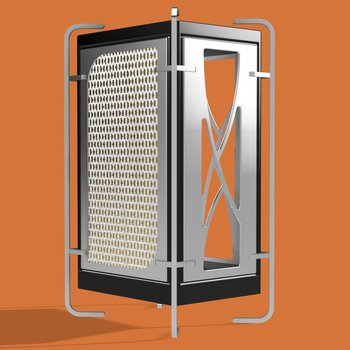
This is pretty much the final design, other than that big side grill which will be replaced with something far cooler that you won’t see until the end of this worklog. So keep going!
Custom parts
So, the custom parts will divide in two main categories: panels, and legs/brackets. The panels mount on the case and the legs mount on the brackets which mount on the panels. Sounds hard but it’s actually a super easy concept!
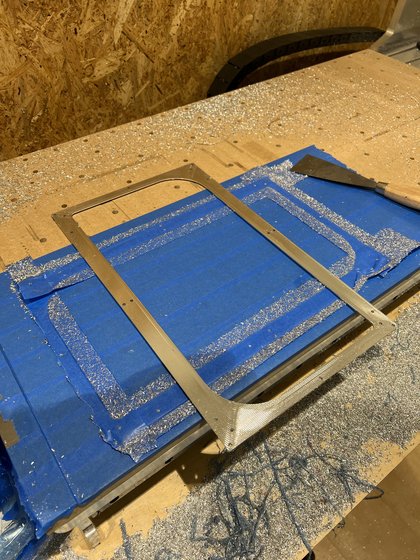
First things first, the panels. Toughest part was getting the tolerances just right to make them fit to a T into the original sockets where the mesh would sit. I didn’t have a 3D model of the case so every measurement had to be taken manually and moved into the software.
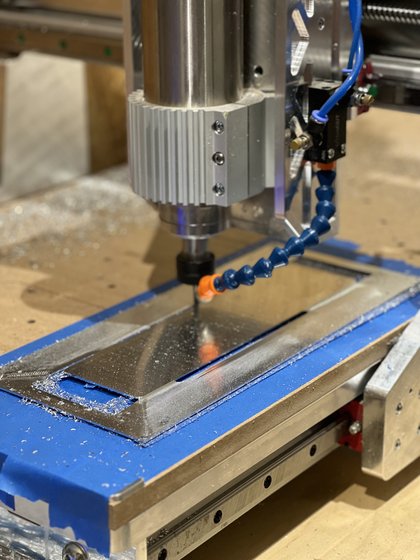
Now let’s get started with something I love: videos of the CNC eating through material to create a vision!
This first machining job will take care of all of the five custom panels. I went through opening the air vents first.
For an extra clean finish, I gave all of the edges a nice chamfer.
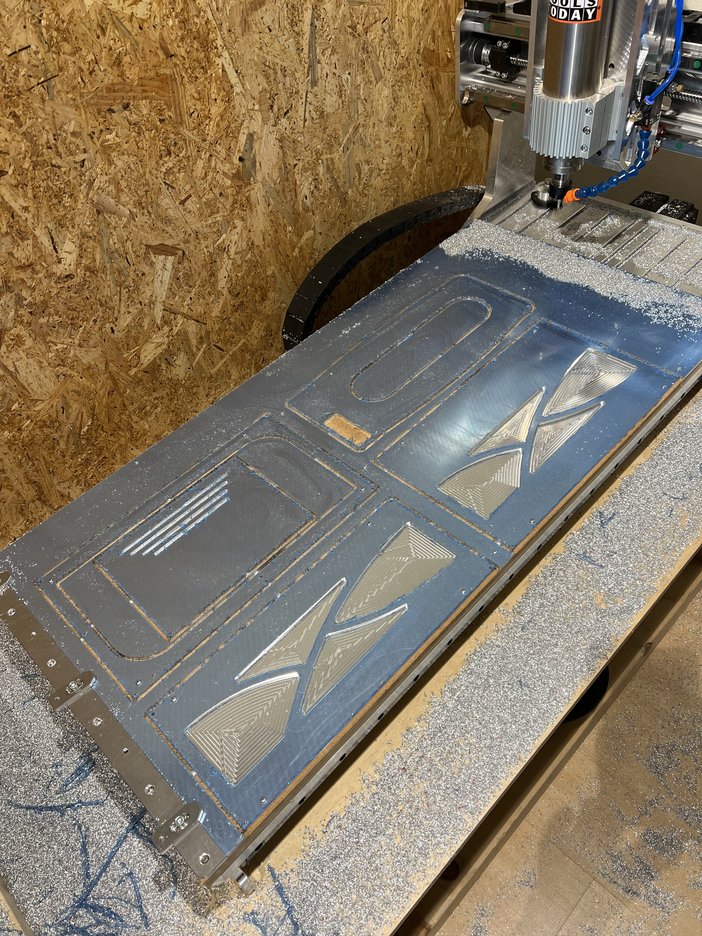
As you can see, I didn’t go all the way through those big air vents, because all of these panels will have to brought down from 5mm to 3mm thickness, so that remaining material will be removed by flipping the panel and giving it a nice fat loss diet!
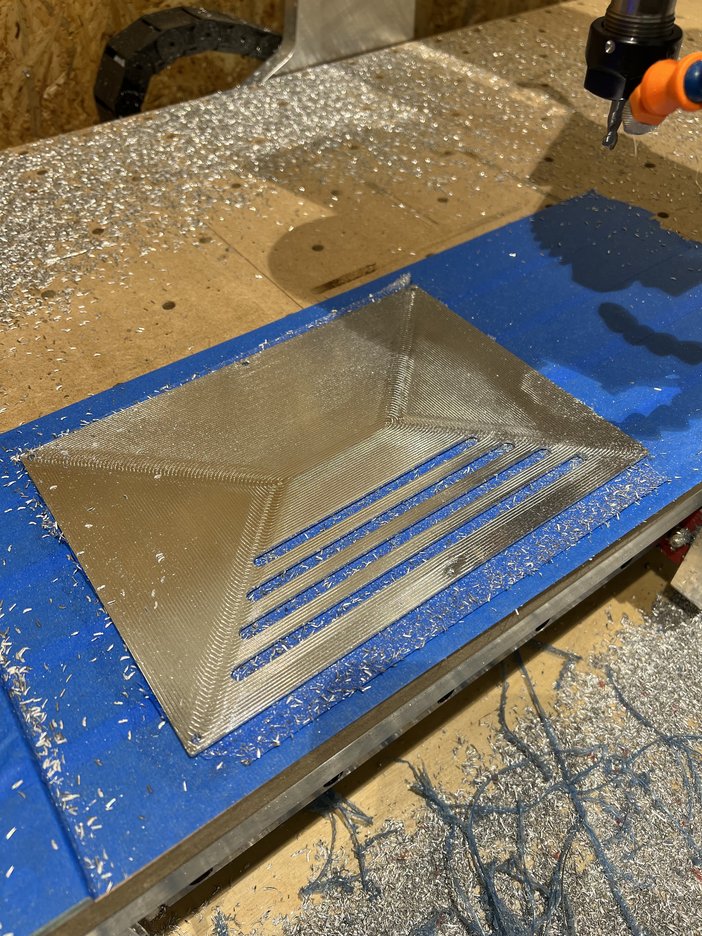
Achieving a great finish wasn’t really the goal here since this side will be the one facing the internals, but I gotta say this looks quite nice albeit very raw.

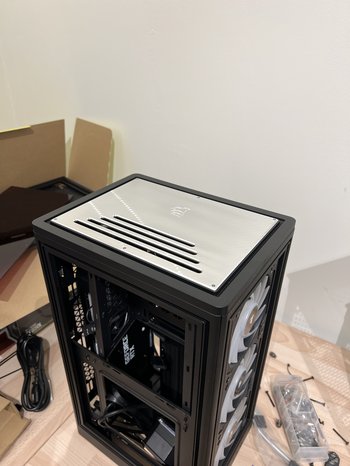
Anyway, I did this to bring the edge of the panels closer to the plastic ones so they have a smooth transition, also thanks to the chamfer, and look basically stock. I also added a nice little engraving of the Corsair logo because well, Corsair!

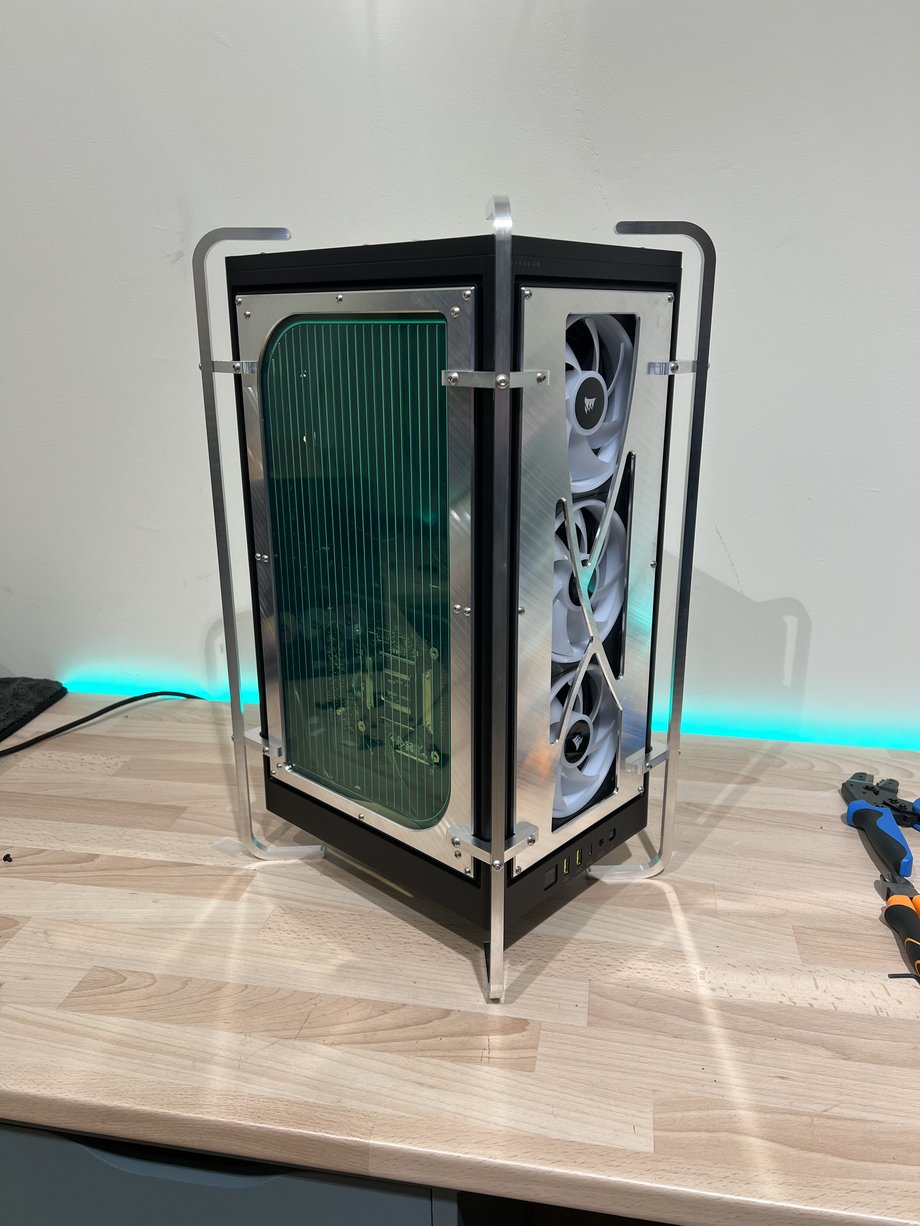
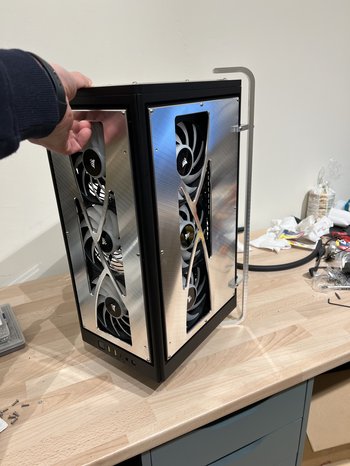
Same diet for the other panels and finally a full test fit for them!

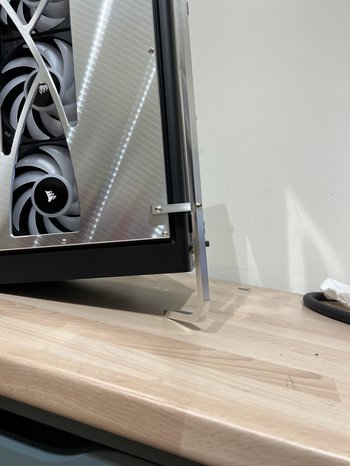
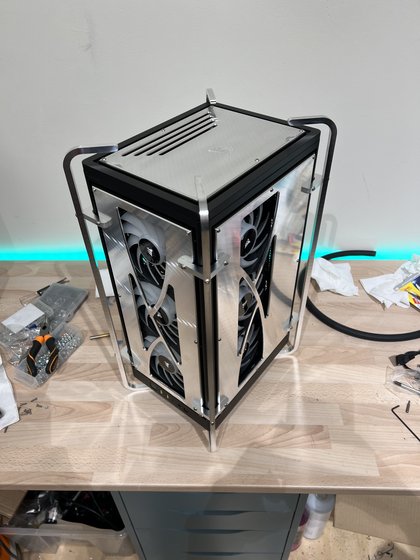
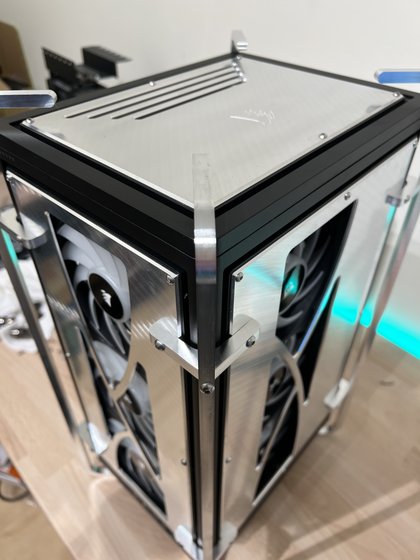
And with these done, it’s time for the smaller bits! Eight right angle brackets for the legs and the four actual legs, to be precise.
Made out of some hefty 8mm aluminum, these ones definitely needed a good edge finish since it was to be very exposed and visible, so that was the focus!
The holes on the edge of these parts were made on the drill press after they were cut on the CNC, but my silly brain forgot to take any videos and pictures of that step, but it’s not like it’s one of the most delicate yet fun parts of the entire project… not… at all… Anyway!
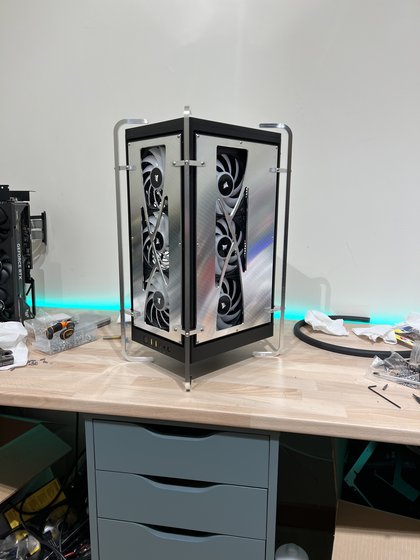
After drilling all of the holes, it all came together and the reflections went crazy! All this shiny aluminum at multiple angles definitely does create some beautiful light shows.
There’s one last panel left to cut, and if you were focused enough, you may already know what I’m talking about. But first! - let’s put the hardware together.


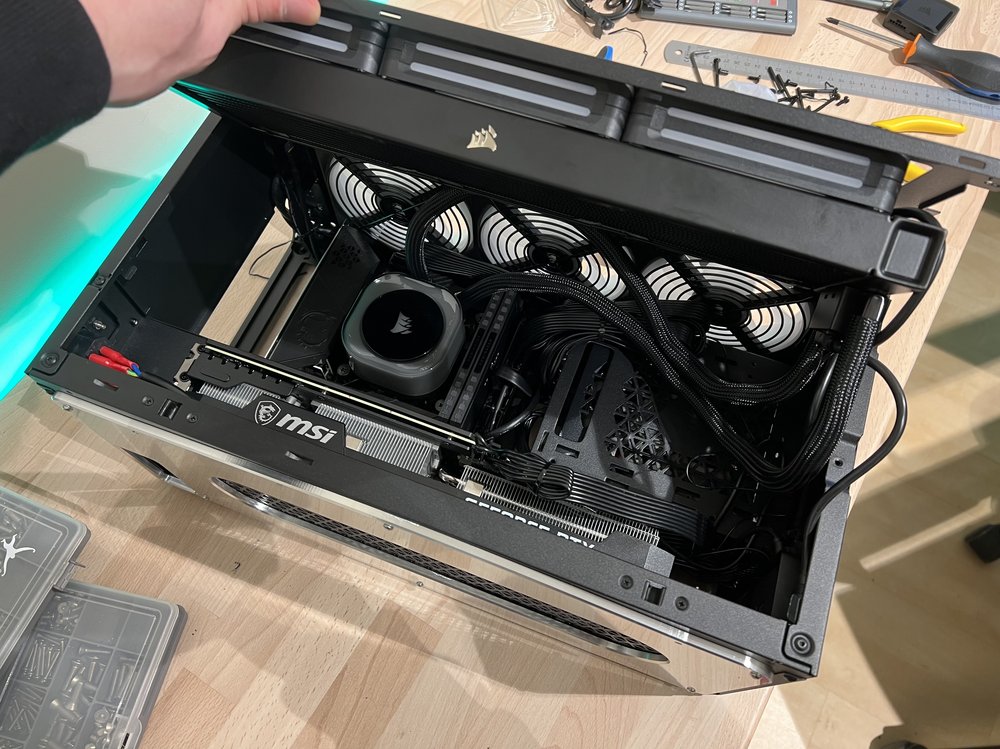
If I said this was an extremely smooth process despite the very little space to work with, I would be lying of course, but it was actually not that bad!
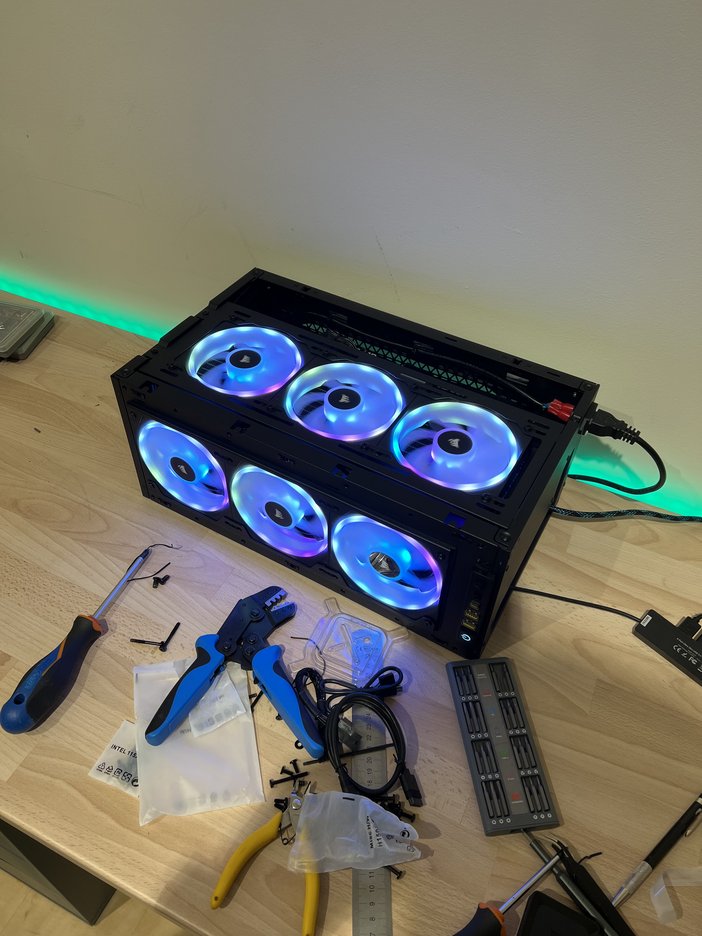
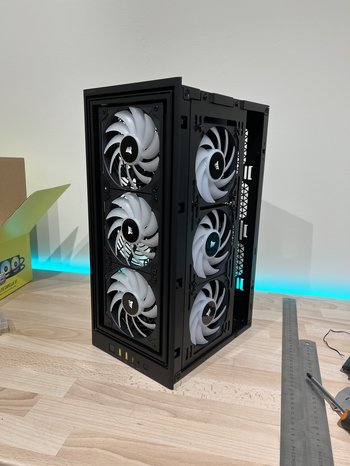
Aaand we got lights! Now to play around with iCUE.
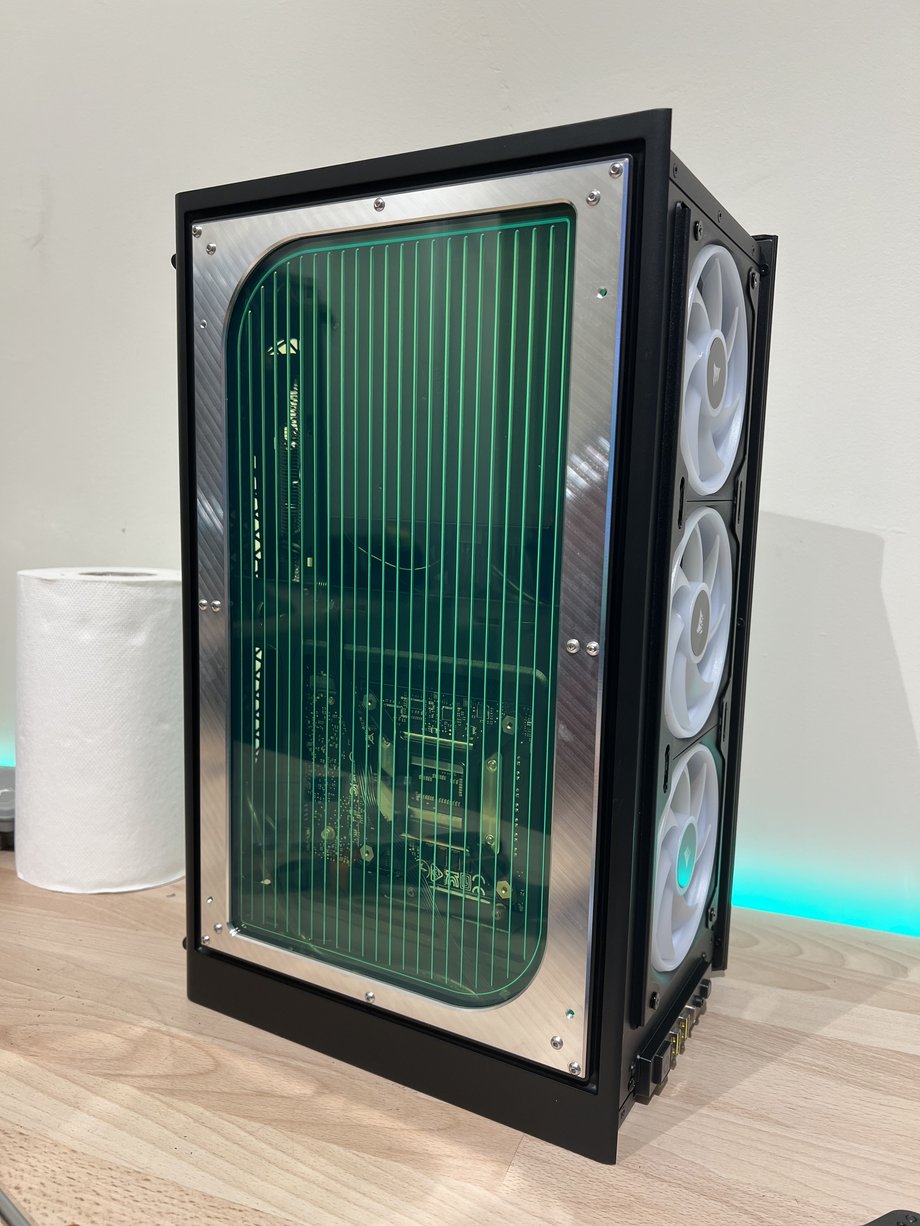
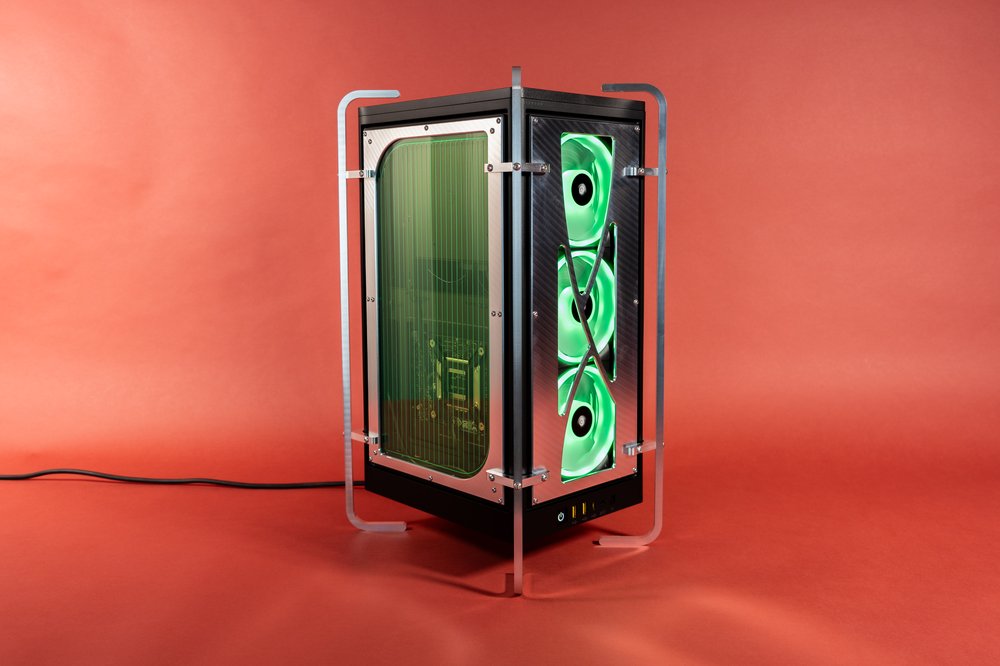
The last custom piece is my favorite, because it makes the whole thing pop. Let’s get cutting!

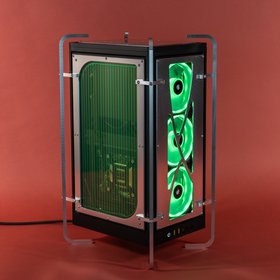
You saw it, a clear green acrylic panel with a sleek engraving! This is replacing the mesh I put in the final render you saw in one of the first images.
I love how you can see the back of the motherboard and some of the cables through the green acrylic, it really adds another layer of depth to the build.
Now one last detail that you may have noticed looking at some of the photos.

The case originally allows you to route the power cable from the top all across the back side using some velcro ties, but those came off when I basically redesigned the entire exteriors, plus I thought of a cleaner solution. I cut out a slot at the bottom of the case for a pass-through power connector, so now the cable runs from the PSU, into the case and to the bottom pass-through. Much cleaner, it just requires an angled cable in order to make the connection at the bottom.
And this is a wrap! I’m very happy with how Quattro came out, from a pretty simple concept to a very fresh and unique looking 2000D!
I hope you enjoyed the build and worklog. Thank you for reading and see you next time!


PRODUCTS IN ARTICLE