CASE SPECIFICATIONS
ACCESSORY KIT CONTENTS
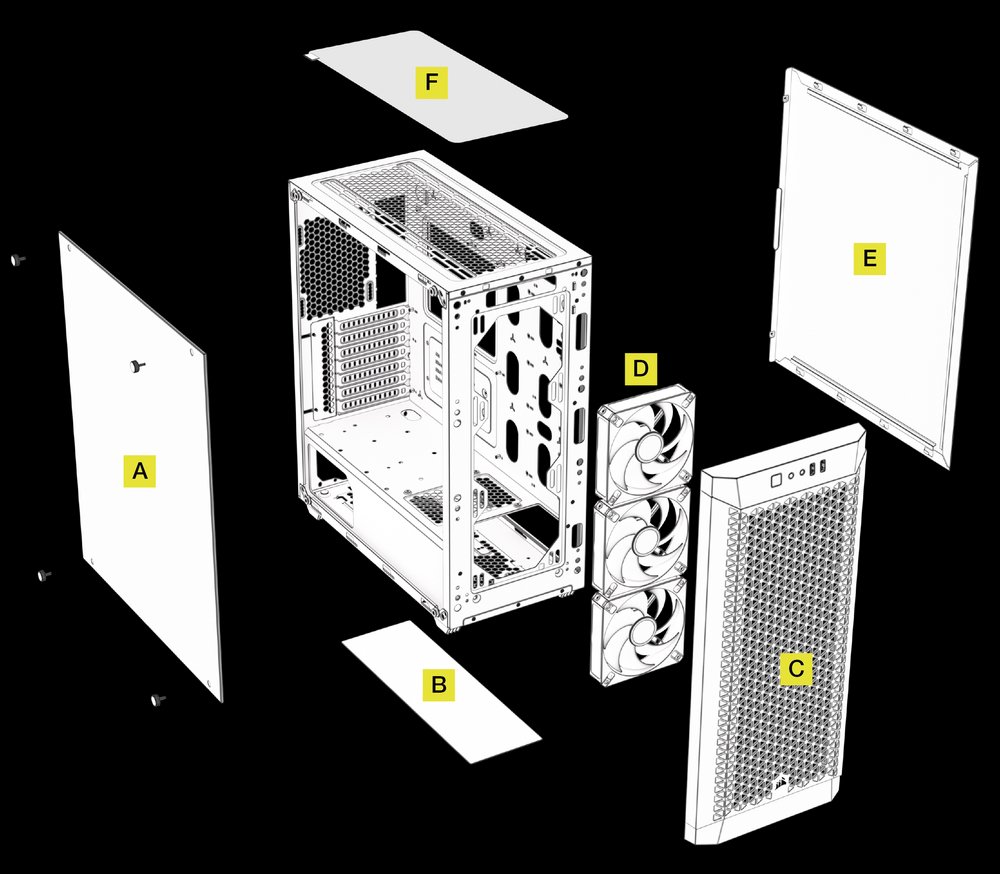
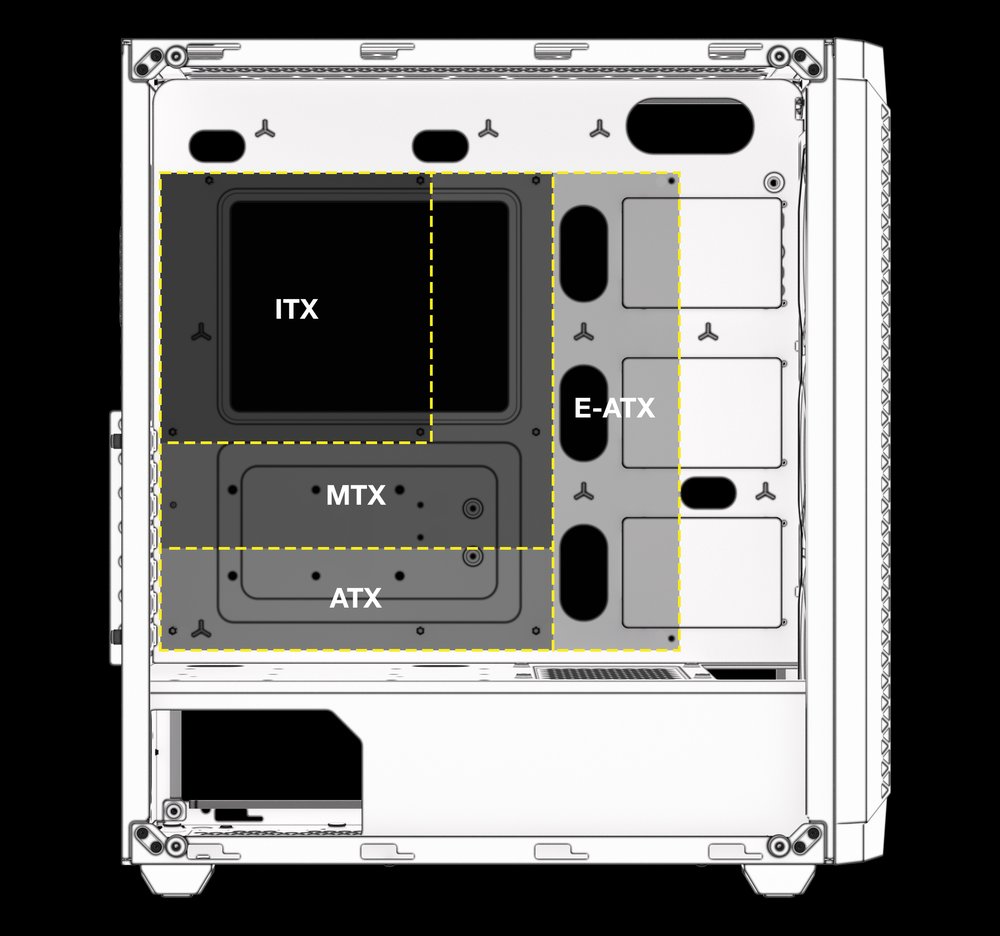
CASE EXPLODED VIEW
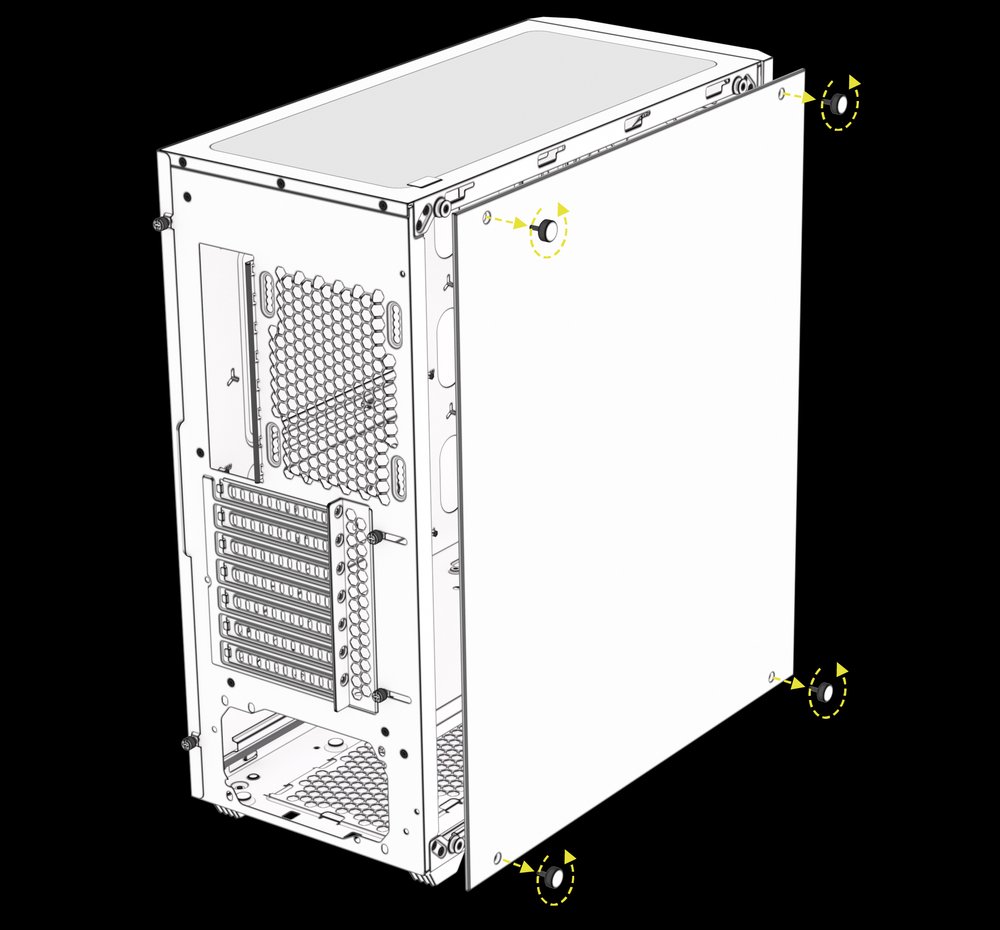
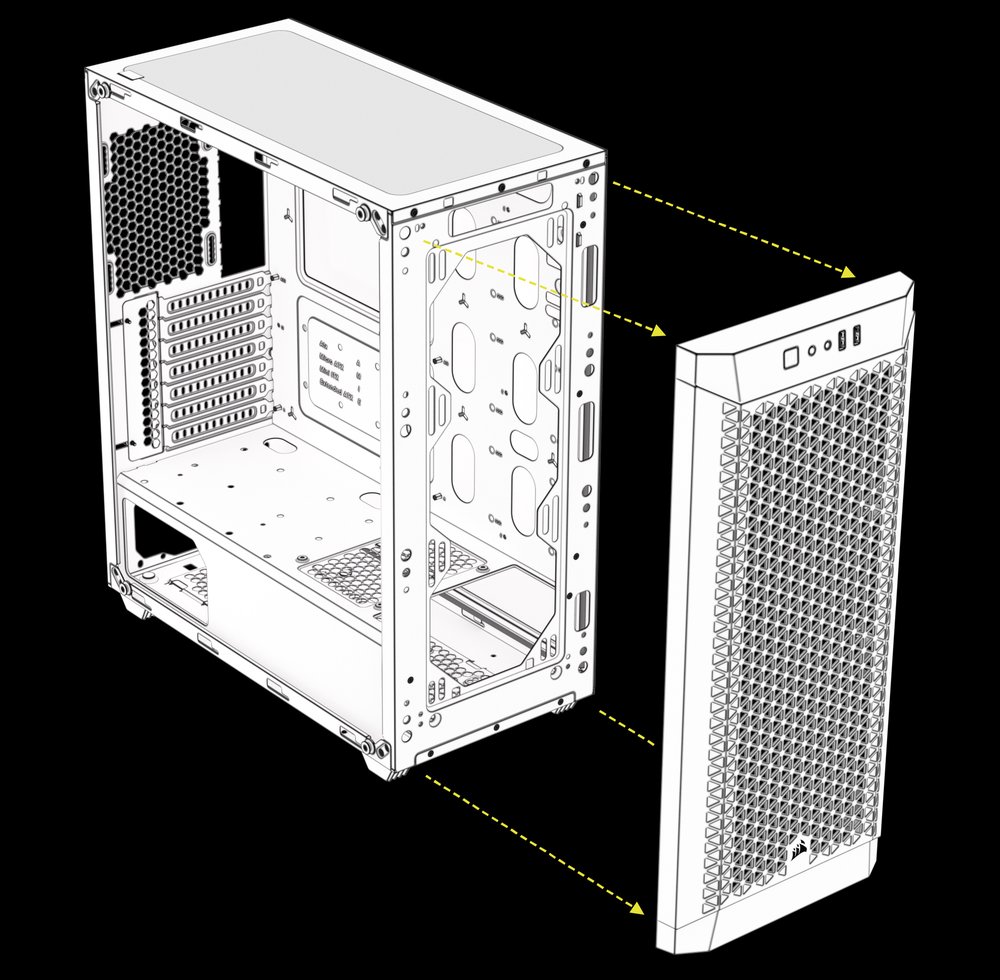
REMOVING THE PANELS
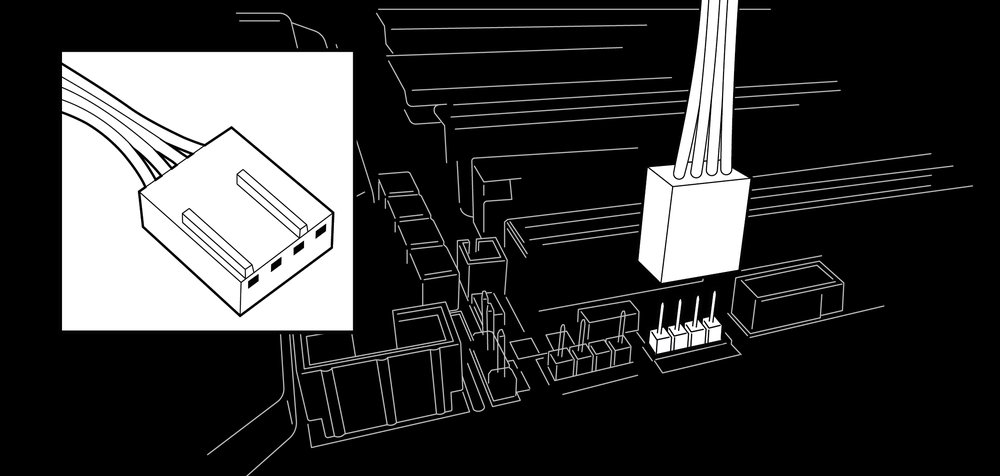
INSTALLING THE MOTHERBOARD
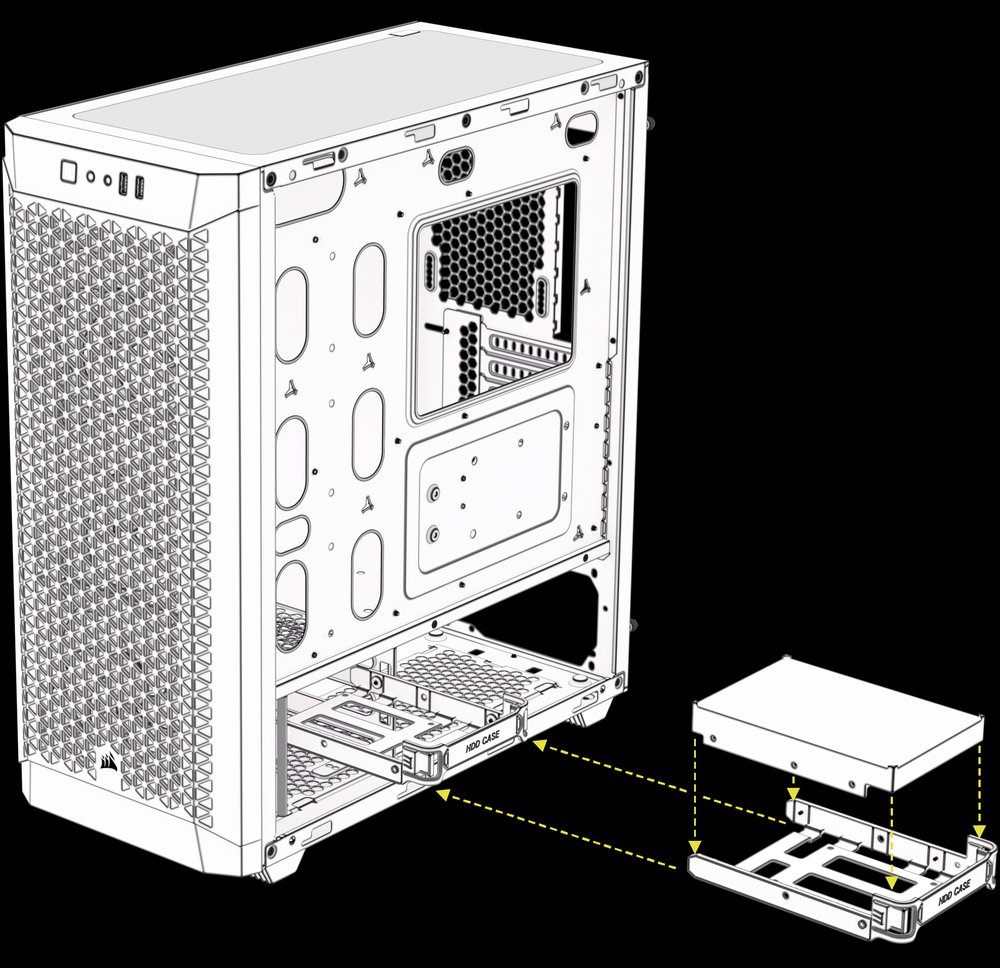
INSTALLING HARD DISK DRIVES
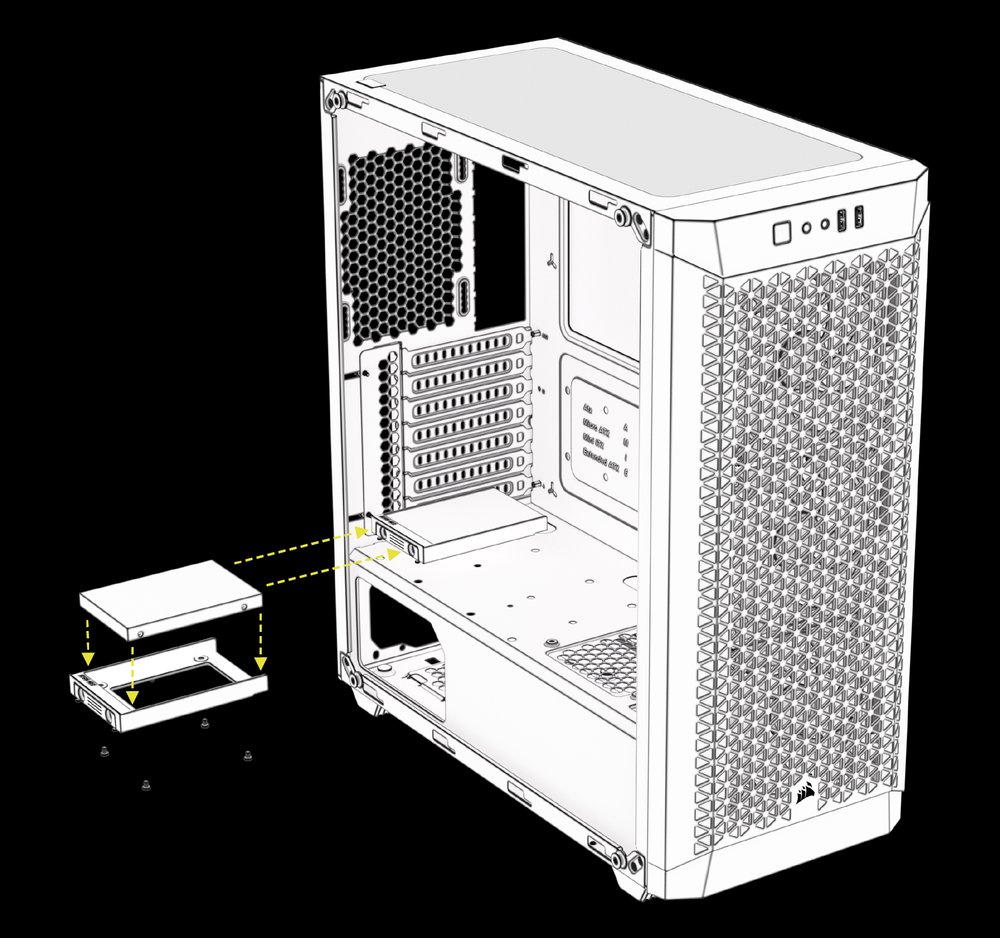
INSTALLING A SOLID STATE DRIVE
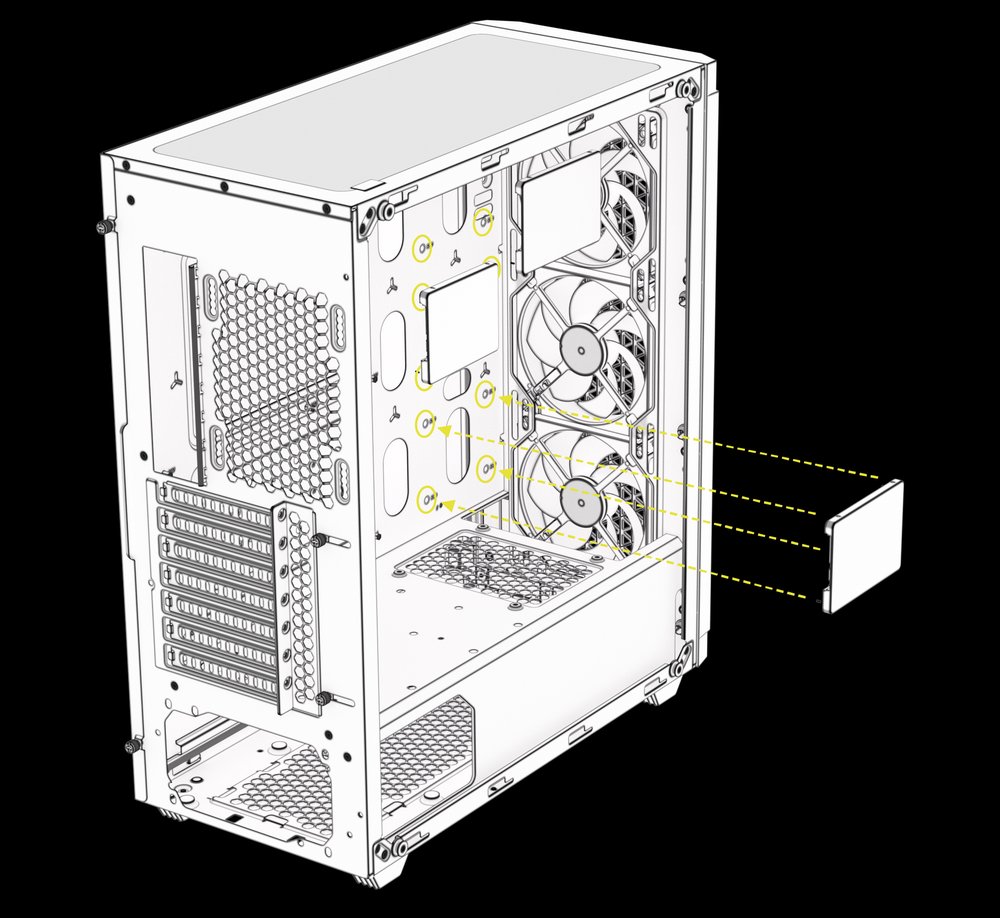
INSTALLING A POWER SUPPLY UNIT
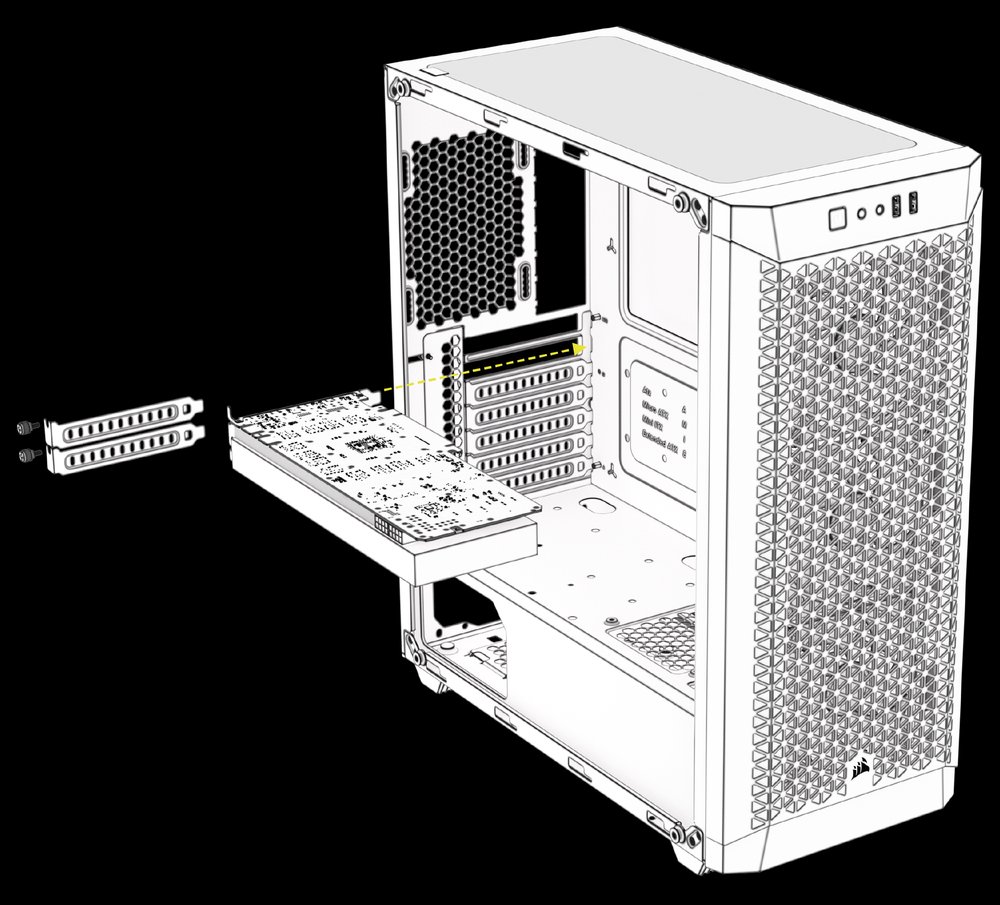
INSTALLING PCI DEVICES
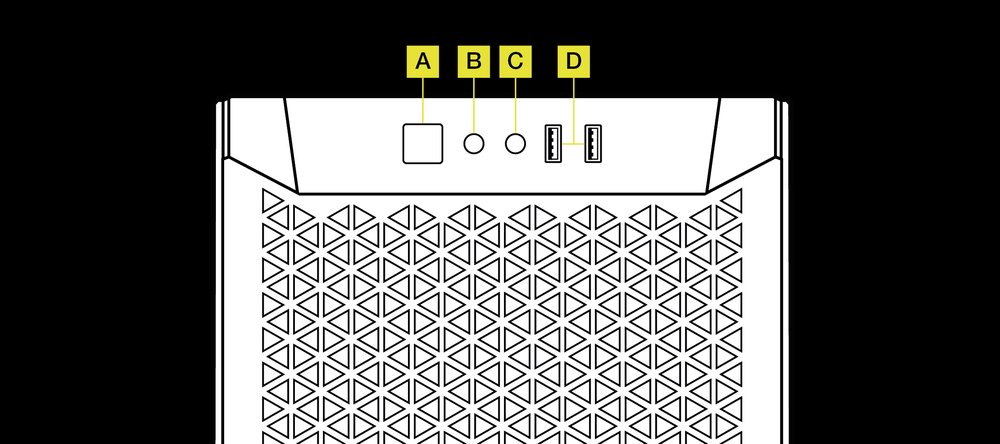
TOP I/O EXPLANATION
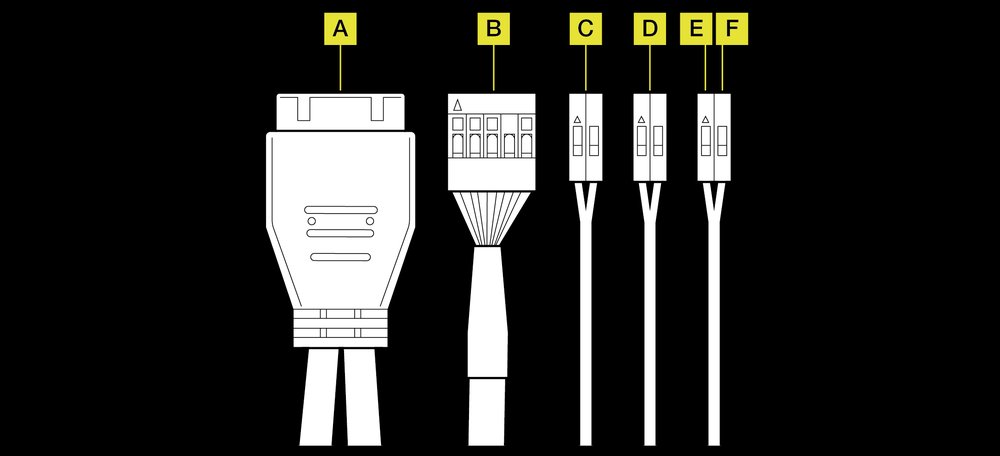
FRONT I/O CONNECTIONS
FAN INSTALLATION (ARGB - 480T RGB MODEL ONLY)
FAN INSTALLATION FOR iCUE CONTROL (Optional)
WARRANTY
LEGAL

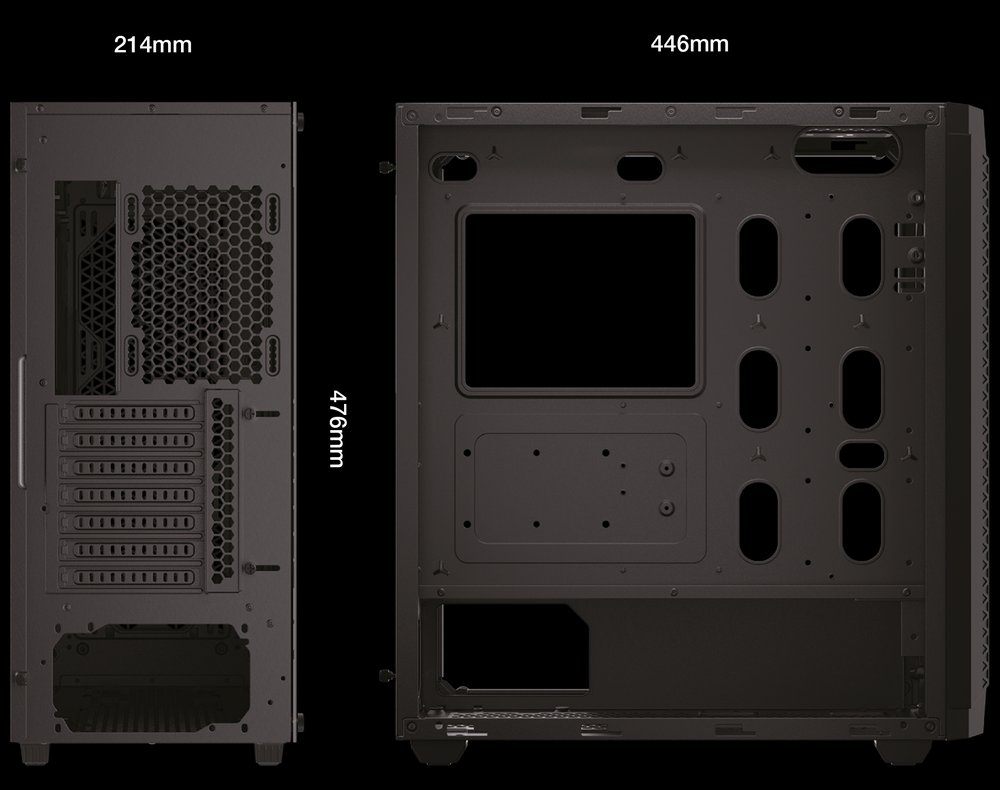
CASE SPECIFICATIONS
|
Length |
446mm |
|
Width |
214mm |
|
Height |
476mm |
|
Maximum GPU length |
400mm |
|
Maximum CPU height |
165mm |
|
Maximum PSU length |
220mm |
FAN LOCATIONS
|
Front |
3x 120mm / 2x 140mm |
|
Top |
3x 120mm / 2x 140mm |
|
Rear |
1x 120mm |
RADIATOR COMPATIBILITY
|
Front |
360mm / 280mm |
|
Top |
360mm / 280mm |
|
Rear |
120mm |
ACCESSORY KIT CONTENTS
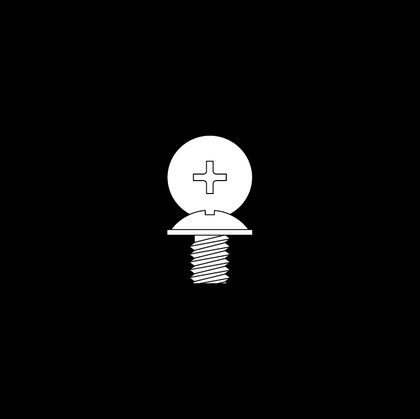
12x MBD / HDD screws

8x SSD screws
1x Motherboard standoff
3x Cable ties
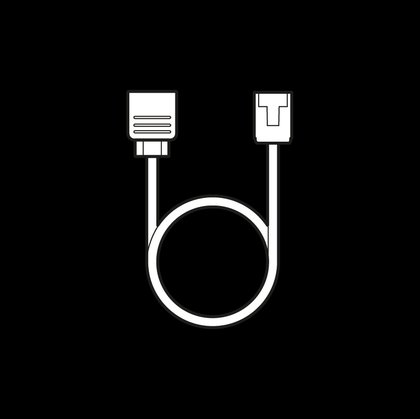
1x ARGB adapter cable (480T RGB only)

CASE EXPLODED VIEW
REMOVING THE PANELS
REMOVING THE GLASS SIDE PANEL
REMOVING THE FRONT PANEL
INSTALLING THE MOTHERBOARD
INSTALLING HARD DISK DRIVES
Hard drive cage and HDD sleds sold separately.
INSTALLING A SOLID STATE DRIVE
3x 2.5” SSDs mount directly to the chassis, no sleds required.
PSU cover mounted SSD trays sold separately.
INSTALLING A POWER SUPPLY UNIT

INSTALLING PCI DEVICES
TOP I/O EXPLANATION
FRONT I/O CONNECTIONS
FAN INSTALLATION (ARGB - 480T RGB MODEL ONLY)
MOUNTING AND CONNECTING THE FANS
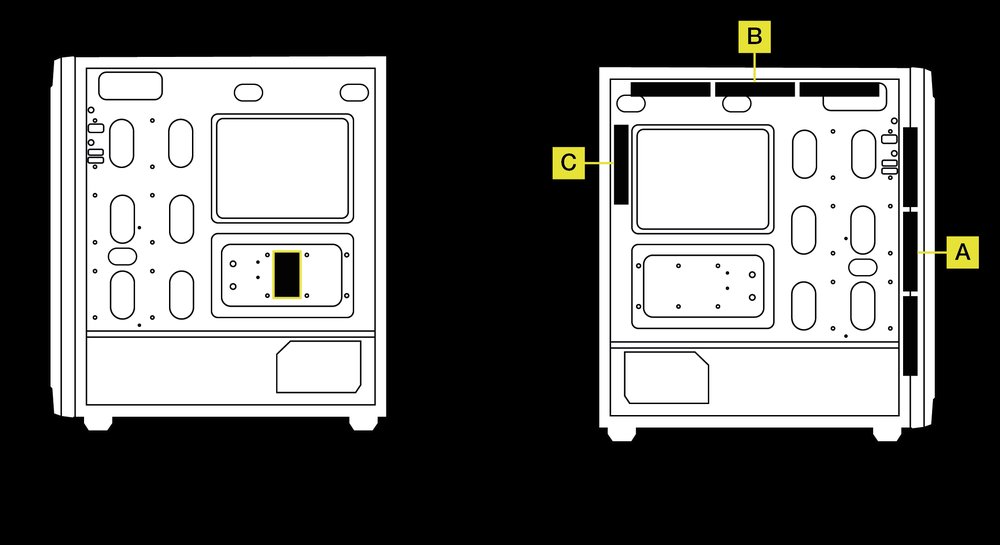
1. Mount the fans inside your case with the provided mounting screws:
- Front: 3x 120mm* / 2x 140mm (A)
- Top: 3x 120mm / 2x 140mm (B)
- Rear: 1x 120mm (C)
2. If you are using a single fan, connect the RGB LED cable from the AR RGB fan to the ARGB adapter cable to enable 5V ARGB (Addressable RGB) 3-pin header connection. If you are using a triple fan kit, connect the RGB LED cables from each AR RGB fan in sequence (1 > 2 > 3) to the 1-to-3 adapter cable.
CONNECTING THE ARGB CONNECTOR
Connect the ARGB connector from the ARGB adapter cable or 1-to-3 ARGB adapter cable to the +5V ARGB header on a compatible motherboard.

CONNECTING THE PWM CONNECTOR
Connect the 4-pin PWM connector into an available 3-pin or 4-pin (recommended) fan header on your motherboard or fan controller. You can use fan splitter cables (sold separately) if your motherboard does not have enough fan headers.
ARGB SETUP
To ensure that the ARGB header on your motherboard functions properly, it is important to follow the proper procedures for installing the necessary software. The specific software you need to install may vary depending on the make and model of your motherboard, so it is important to refer to your motherboard's manual to determine the exact steps you should follow.
Typically, you will need to download and install a specific software program provided by the motherboard manufacturer. This software program will allow you to control and customize the lighting effects on your ARGB components.
FAN INSTALLATION FOR iCUE CONTROL (Optional)
MOUNT LIGHTNING CONTROLLER AND FANS
1. Find a location for the iCUE lighting controller that allows the fan RGB LED cable to reach the controller, then mount it with mounting strips included with the controller. The Lighting Node CORE is used as an example in this installation illustration; it is recommended to follow the instructions included with your chosen iCUE lighting controller.
2. Mount the fans inside your case with the provided mounting screws:
- Front: 3x 120mm / 2x 140mm (A)
- Top: 3x 120mm / 2x 140mm (B)
- Rear: 1x 120mm (C)
CONNECT FAN TO RGB CONTROLLER
Connect the 4-pin RGB connector from your AR RGB fan into the iCUE lighting controller in sequential order from port #1 to #6.

CONNECT LIGHTNING NODE CORE
1. Plug the 9-pin USB cable from the Lighting Node CORE into an available internal USB 2.0 header on your motherboard or USB hub.
2. Connect the SATA power connector to an available SATA connector from your power supply.

iCUE SETUP
1.Download CORSAIR's latest iCUE software and install it on your computer.

2. Once iCUE is installed, select the “8-LED fan Series” in the Lighting Setup page under Lighting Node CORE.

Please visit our CORSAIR LAB YouTube channel for more tips and instructions on how to get the most out of your new CORSAIR fans.
iCUE COMPATIBILITY
|
LIGHTING NODE CORE |
LIGHTING NODE PRO |
COMMANDER PRO |
COMMANDER CORE |
COMMANDER CORE XT |
|---|---|---|---|---|
|
Up to 6x RGB fans, RGB Lighting Control only |
Up to 12x RGB fans, RGB Lighting Control only (requires RGB LED hub, sold separately) |
Up to 12x RGB fans for RGB Lighting Control (requires RGB LED hub, sold separately) Up to 6x fans for fan speed control |
Up to 6x RGB fans for RGB Lighting and fan speed control |
Up to 12x RGB fans for RGB Lighting Control (requires RGB LED hub, sold separately) Up to 6x fans for fan speed control |
FAQ
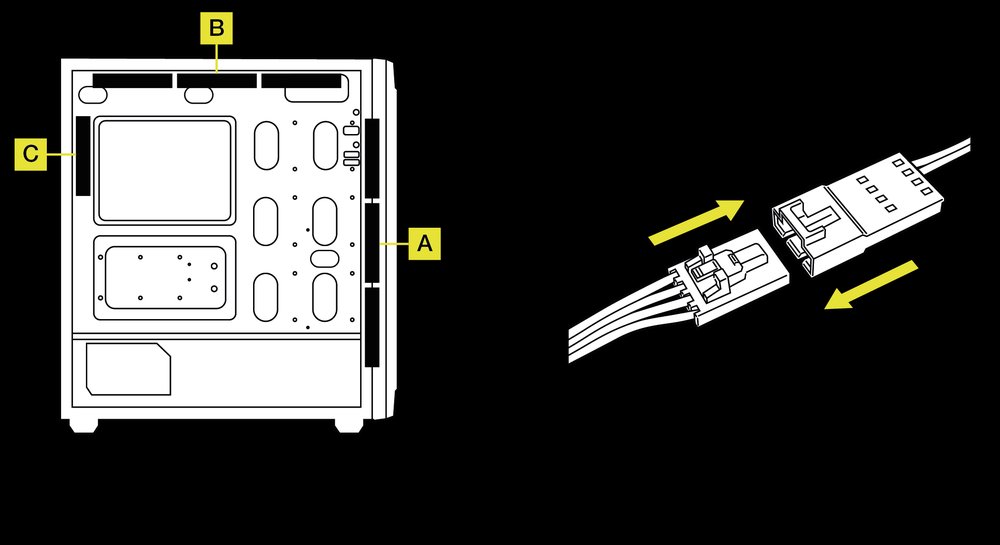
Does the polarity matter with the I/O panel’s power and reset header?
No, only the LED headers.
Who should I contact if I received my case damaged or one of the fans is no longer working?
Where can I mount the fan?
Front: 3x 120mm / 2x 140mm
Top: 3x 120mm / 2x 140mm
Rear: 1x 120mm
WARRANTY

All CORSAIR computer cases have a 2-year warranty.
LEGAL
© 2024 CORSAIR MEMORY, Inc. All rights reserved. CORSAIR and the sails logo are registered trademarks of CORSAIR in the United States and/or other countries. All other trademarks are the property of their respective owners. Product may vary slightly from those pictured.