Like nearly all content management systems, WordPress uses a templating system to handle the output of content on the front end of a website. In modern block themes, templates are HTML files with block markup.
In this document, you will learn how the templating system in WordPress works. After that, you can jump ahead to the more detailed Templates and Template Parts documentation.
What are templates?
In a nutshell, templates take dynamic data and wrap it into structured HTML markup, which is then sent to the browser. It is not a particularly revolutionary concept, and it is one that nearly every website system with dynamic data uses.
The templating system in WordPress does a few important things:
- Parses block markup, which is used to reference static and dynamic data.
- Retrieves dynamic data (e.g., post content, site options, etc.) from the database.
- Sends the resulting HTML to the visitor’s browser.
The major difference between WordPress and most other platforms is the inclusion of block markup. Block theme templates are made entirely of blocks, which can both represent static or dynamic data. The WordPress templating system parses these blocks to ensure they output the correct content when it is sent to the visitor’s browser.
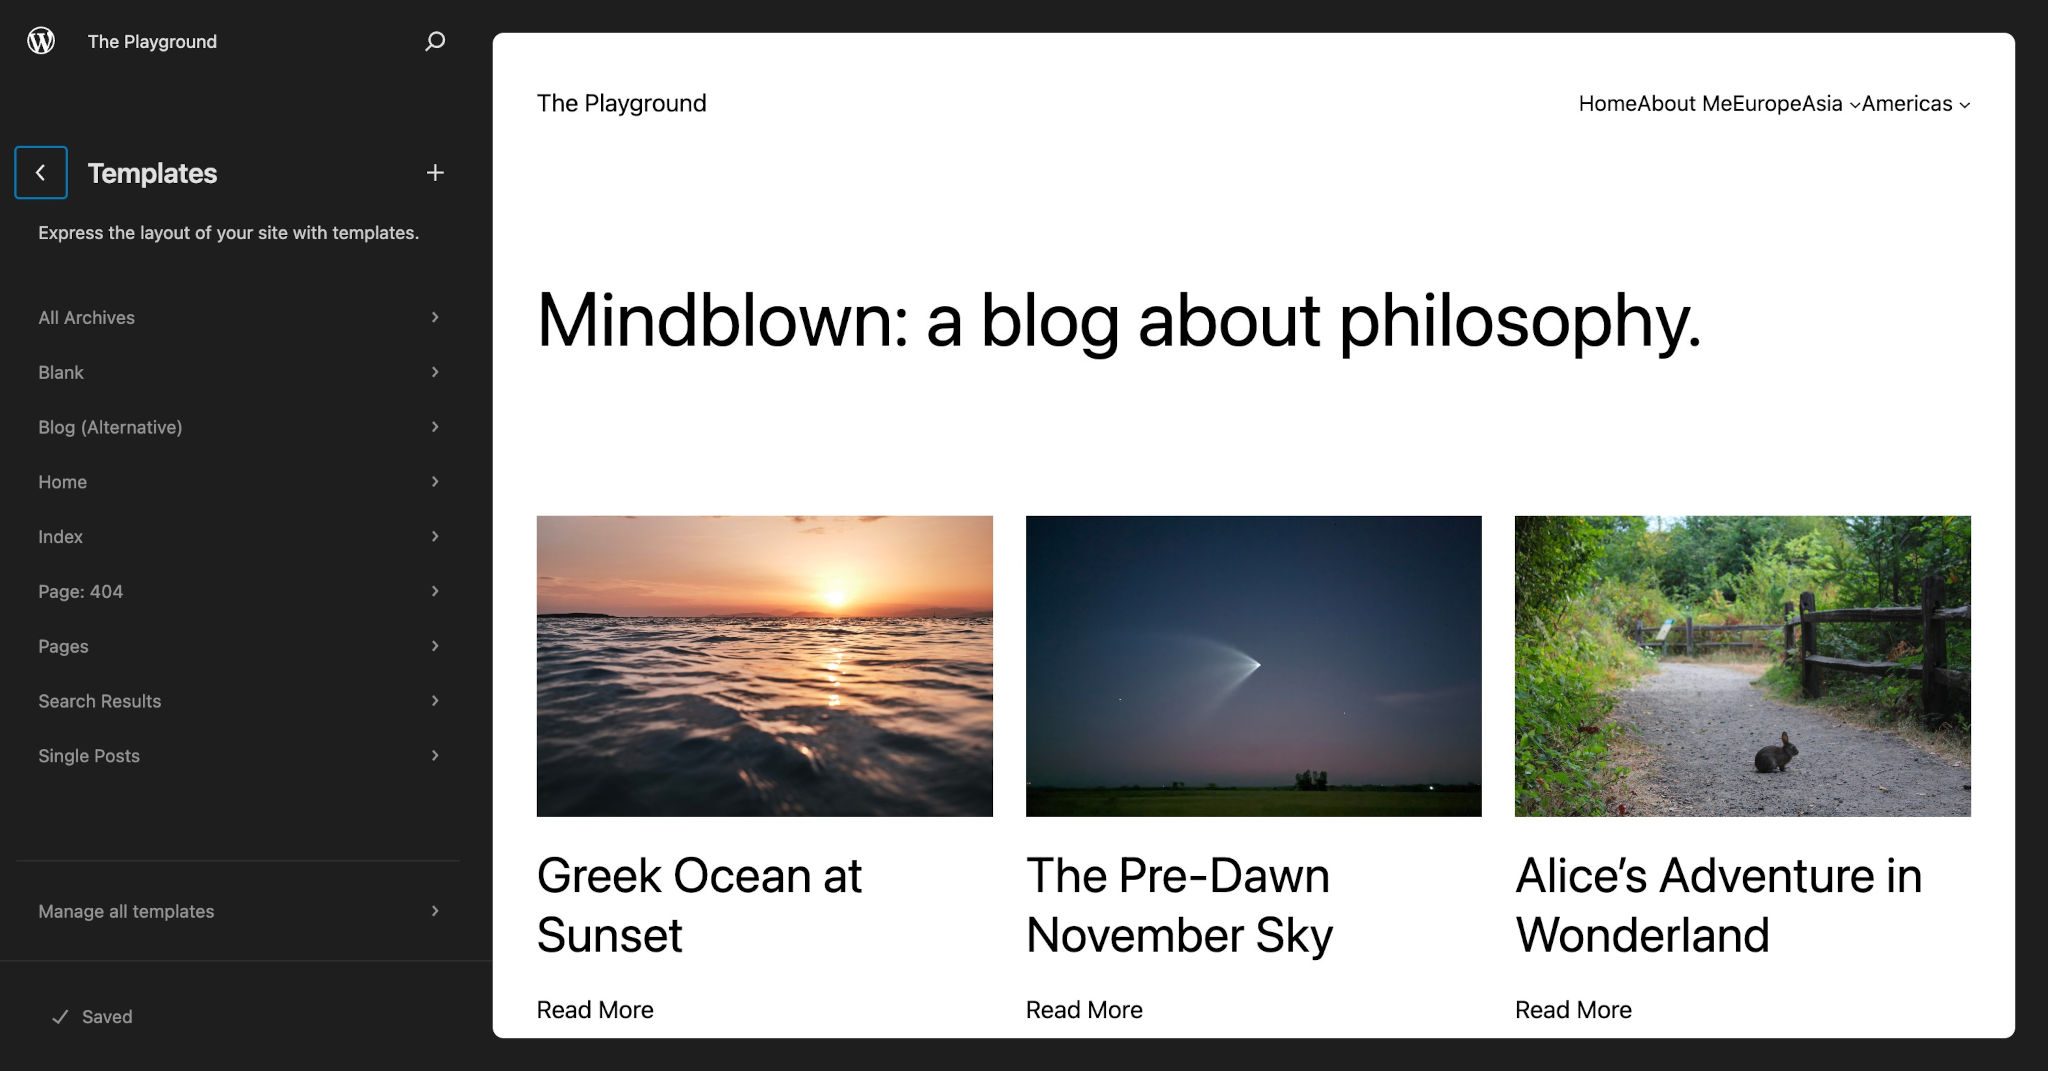
Another thing that WordPress does well is provide a visual interface to build or customize templates directly from the admin:

The Site Editor also lets your theme’s users overwrite your block templates and parts from within the administration interface. Any changes that users make are saved in their site’s database. These customizations are stored the same way in the database as they are in template files: as block markup.
Templates vs. plain HTML
If you’ve already learned some basic HTML, you’ve probably built out a webpage or two. But it can be very hard to build out a full website with HTML because you must constantly update every file anytime you make a global change across the entire site.
This is because HTML is a document language. It does not know how to handle dynamic data, nor can it be used to dynamically load reusable pieces of code.
Technically, block templates are .html files. However, they contain specialized block markup that is parsed by WordPress’ templating system, which is built in PHP (on the front end) and JavaScript (in the editor). Using this system, blocks can be dynamic, despite existing within .html files.
Dynamic data
The major difference between a template and writing plain HTML files is that templates have the ability to insert dynamic data. Let’s look at an example of what this would look like if you were building your website from scratch and not using a CMS like WordPress.
Suppose you wanted to output your site title in plain HTML. You would traditionally wrap it in an <h1> tag and manually type your site name:
<h1>Your Website Name</h1>With WordPress, you don’t need to know the correct HTML or the name of the site. Because a theme can be used on any WordPress site, the site title is dynamic data that will be different from one site to the next.
To output the correct site title and its associated HTML in a block theme, you add the block markup instead:
<!-- wp:site-title /-->By using the block markup, your theme will work anywhere WordPress is installed.
Reusability
One of the principles of good web design is DRY (Don’t Repeat Yourself). When building websites with plain HTML, you must recode all of that HTML for every single page of the site.
For example, most website headers and footers are exactly the same across every page of the site. So it doesn’t make sense to repeat that code for every page. A template system lets you write the code once and reuse it everywhere.
In WordPress, these smaller, reusable sections of a template are called template parts (or simply, parts).
If you were to create a template part named header.html, you could include it using the correct block markup in any template:
<!-- wp:template-part {"slug":"header","tagName":"header"} /-->This lets you reuse the header part in all of your templates, but you only need to create the header.html file once.
Block markup
Templates and template parts are files that are made entirely of block markup that represents individual blocks and their settings. WordPress parses this block markup and translates it to its final HTML markup, which can be understood by web browsers.
Unlike classic themes, WordPress automatically outputs some standard HTML elements for block themes. This includes the wrapping <html> and <body> tags, <head>, and an outer <div class="wp-site-blocks">. WordPress and plugins also automatically output meta, styles, and scripts. In comparison to classic themes, block themes are not responsible for adding PHP hooks.
Block markup is technically valid HTML. WordPress uses a custom HTML comment syntax with a standardized format for the markup.
Let’s take a look at a fictional block’s markup in a template:
<!-- wp:namespace/slug {"align":"full"} /-->As you can see, the code is wrapped with an opening <!-- and closing /--> HTML comment tag. This tells WordPress to look for block markup. The markup can then be broken down into a four parts:
- Prefix: The
wp:prefix tells WordPress that this is a block that needs to be parsed and not just an ordinary HTML comment. This is necessary for core and third-party blocks. - Namespace: The namespace for the block to parse.
- Slug: The slug for the block to parse.
- Block Settings: Valid JSON code that represents the block’s settings.
When working with core WordPress blocks, you do not use the block namespace. For example, the core/site-title block doesn’t include the preceding core/ when called:
<!-- wp:site-title /-->References to third-party blocks must include the namespace.
How to create block markup
You could certainly learn to manually write all of the block markup for your theme by hand. But it can be tough to remember all of the possible block settings, and it is also easy to make an error, resulting in a broken website.
Instead, when building block templates, you will almost always want to build via the block editor and either save directly in the database or copy the block markup into your theme’s template files.
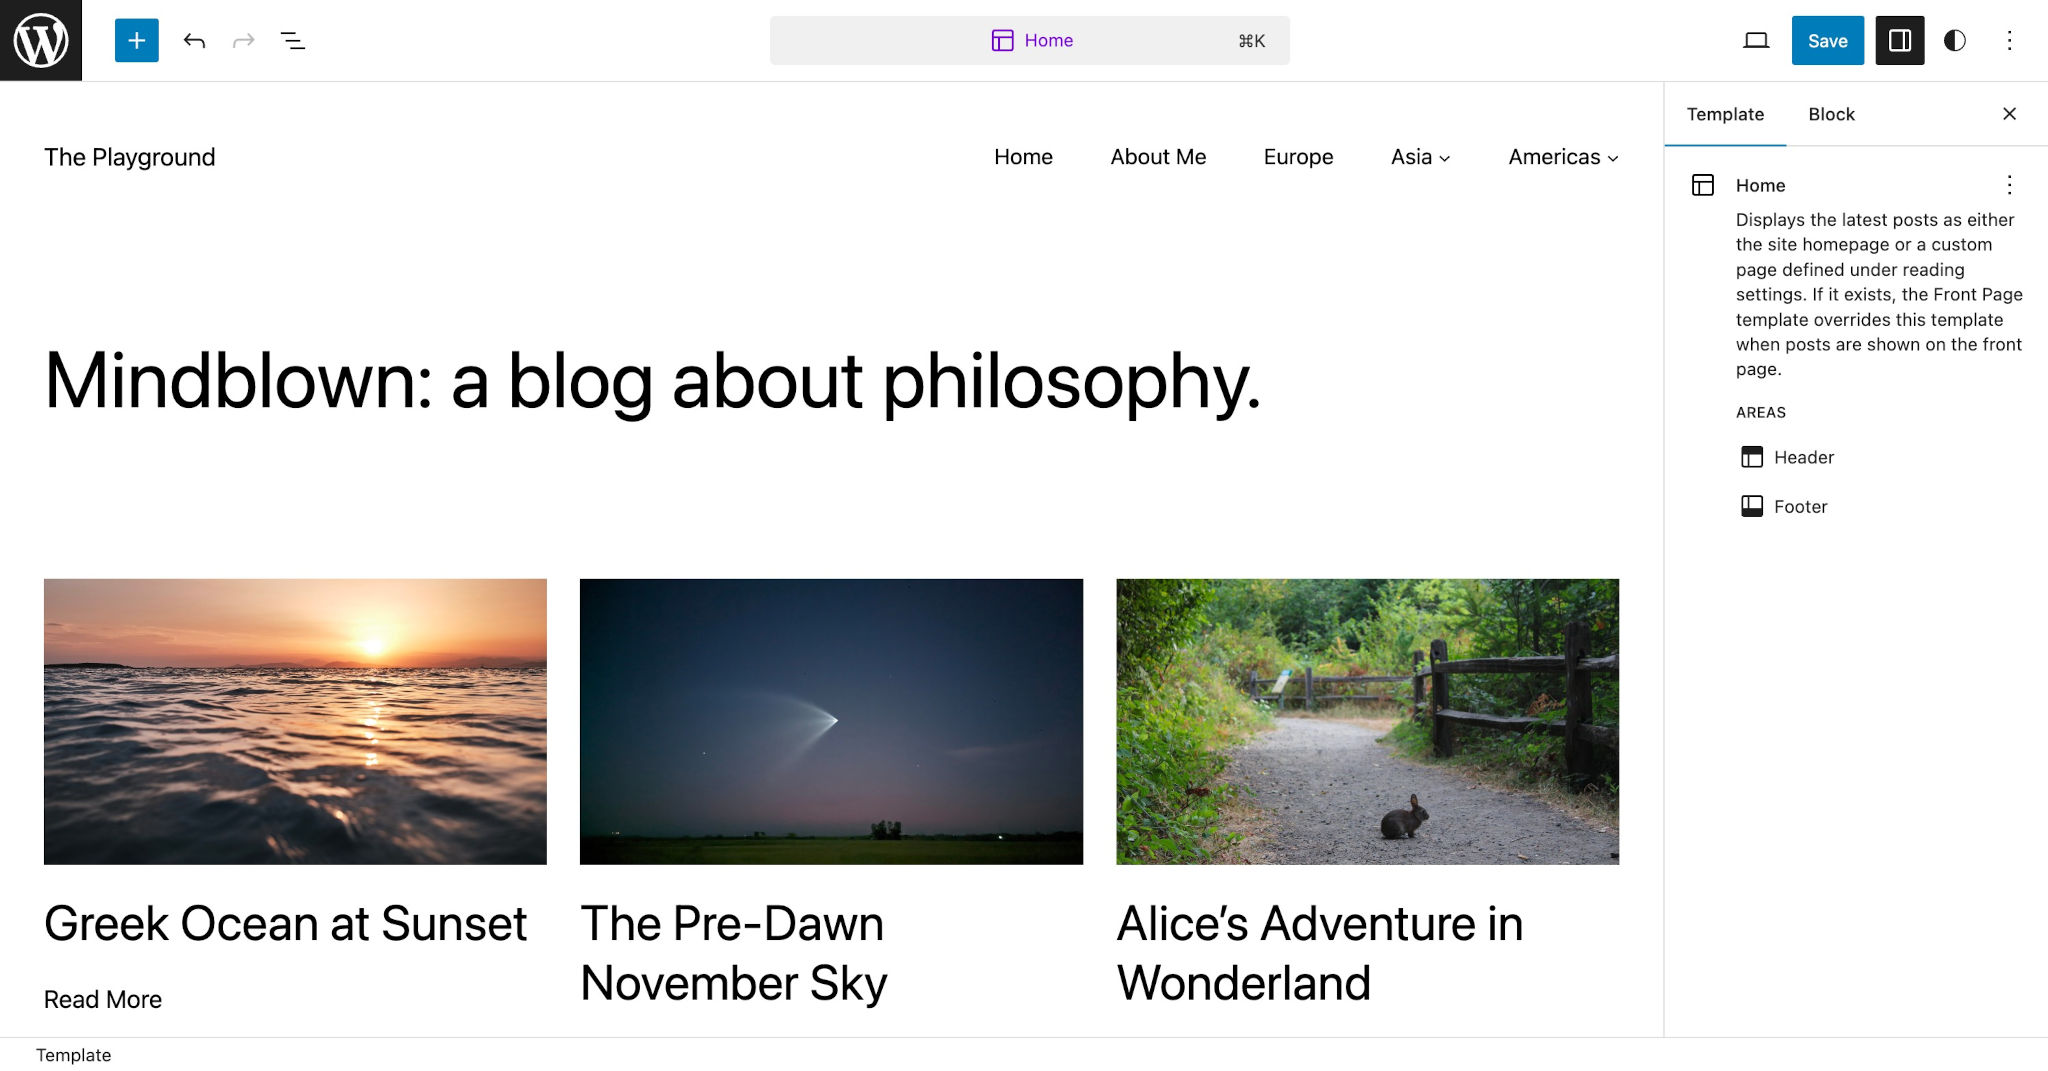
The easiest way to build an entire template is to do so via Appearance > Editor > Templates in the WordPress admin. Here is a look at the Twenty Twenty-Three’s Home template from that screen:

You can customize the template entirely using the visual Site Editor by adding, moving, or deleting blocks. You can also adjust individual block settings.
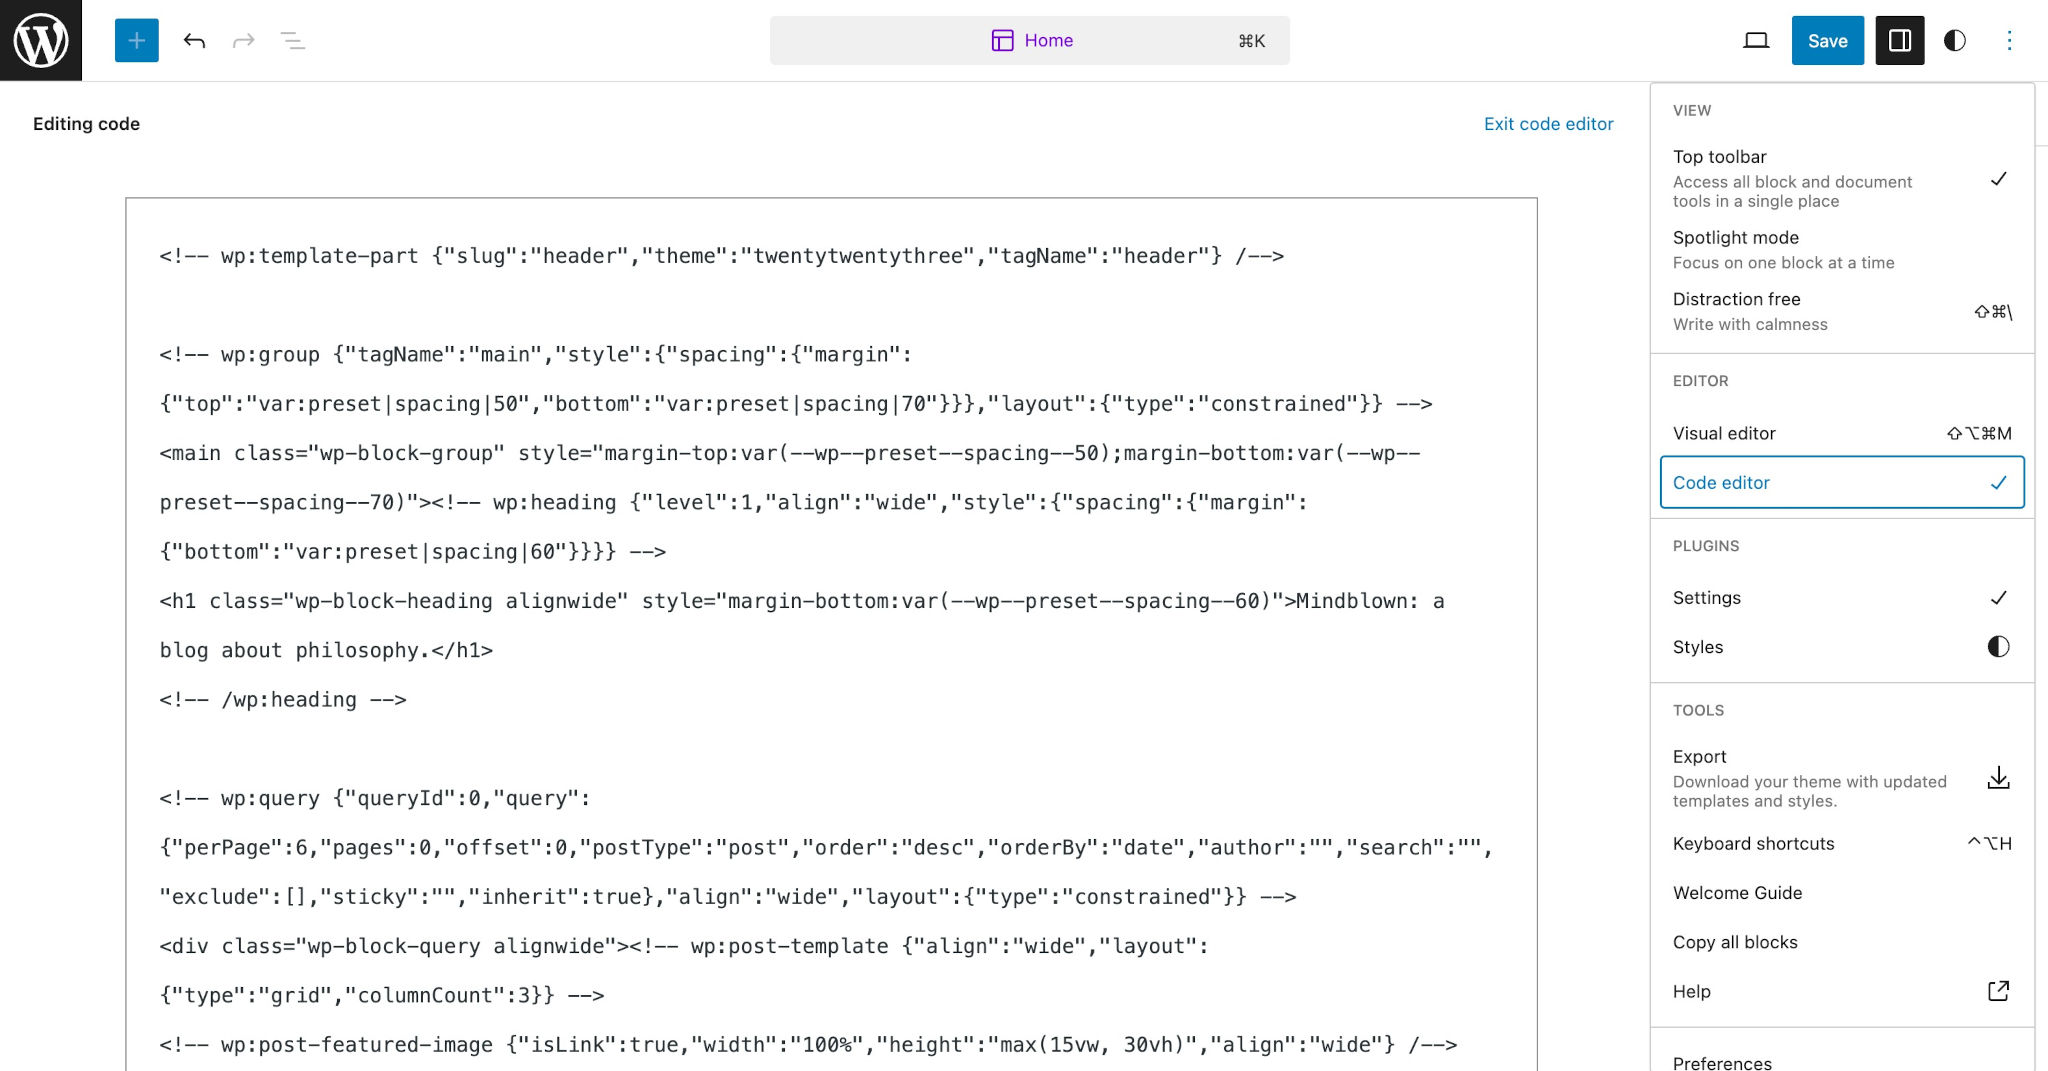
Once your template is designed just like you want, you click the Options button (⋮ icon) in the toolbar and select the Code Editor option. This will give you the block markup for your template. From there, copy and paste it into your template file:

In the case of the Home template, you would paste the block markup in the /templates/home.html template of your theme.
Of course, you only need to do this if you plan on distributing the theme to other people. If this is your own site, you can save the template from that screen, and it will be saved to the database, overwriting the /templates/home.html template file.
Another technique that some theme authors employ is to build from either the Post/Page Editor or Template Editor. Sometimes, they will create certain smaller sections to copy and paste directly into their templates or template parts.
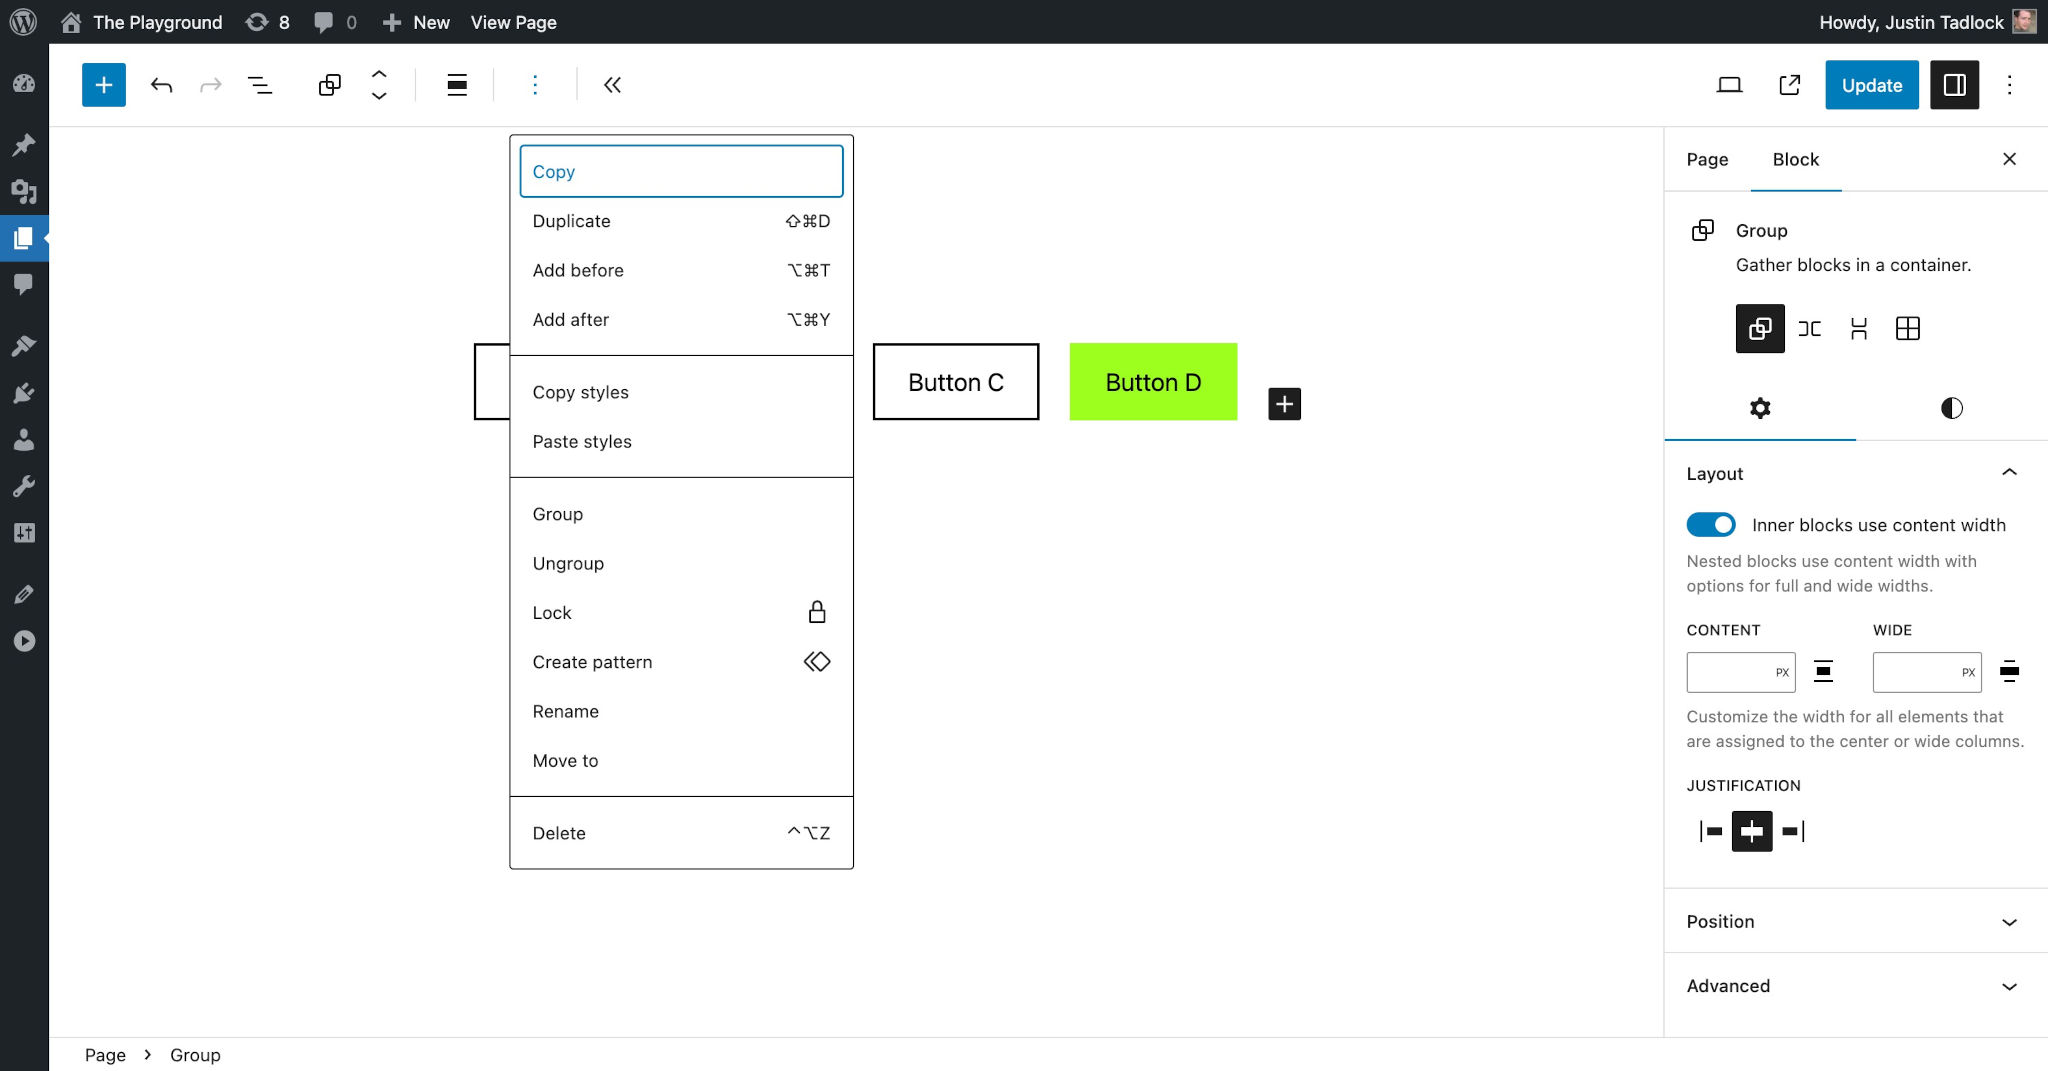
To copy blocks from the Post Editor, select the blocks that you want to use and click the Options button (⋮ icon) from the block-editing toolbar. Then click the Copy button from the dropdown:

From there, you can paste the copied code into your template or template part file. You can also switch to the Code Editor mode from this screen just like in the Site Editor and copy block markup in the same way.
The relationship between templates and parts
Templates represent the overall HTML output that gets sent to the browser. An easy way to think of these is as “top-level templates” because they are the top, outermost level of the template system.
Template parts are partial templates that live within top-level templates. Parts make it easy to include reusable sections without having to recreate the block markup for each of the templates.
In your theme, your templates and template parts will be located in the /templates and /parts folders, respectively. Here is example of what that structure may look like:
parts/footer.htmlheader.html
templates/404.htmlarchive.htmlindex.html(required)singular.html
Let’s look at an example of an archive template (archive.html) and its block markup:
<!-- wp:template-part {"slug":"header","tagName":"header"} /-->

<!-- wp:group {"tagName":"main","layout":{"type":"constrained"}} -->
<main class="wp-block-group">
	<!-- wp:template-part {"slug":"loop","align":"full"} /-->
</main>
<!-- /wp:group -->

<!-- wp:template-part {"slug":"footer","tagName":"footer"} /-->
This template basically behaves as a wrapper that includes three template parts:
/parts/header.html/parts/loop.html/parts/footer.html
This is not the technique that all block themes use, but it is a common practice. Whenever you have code that is repeated across multiple templates, it’s generally a good idea to copy that code into a template part file and include it in your top-level templates.
At this point, you’ve only been learning about templates at an overarching high level. Now it’s time to dive more deeply into the templating system and how each piece of it works. For your next steps, follow along with these docs: